
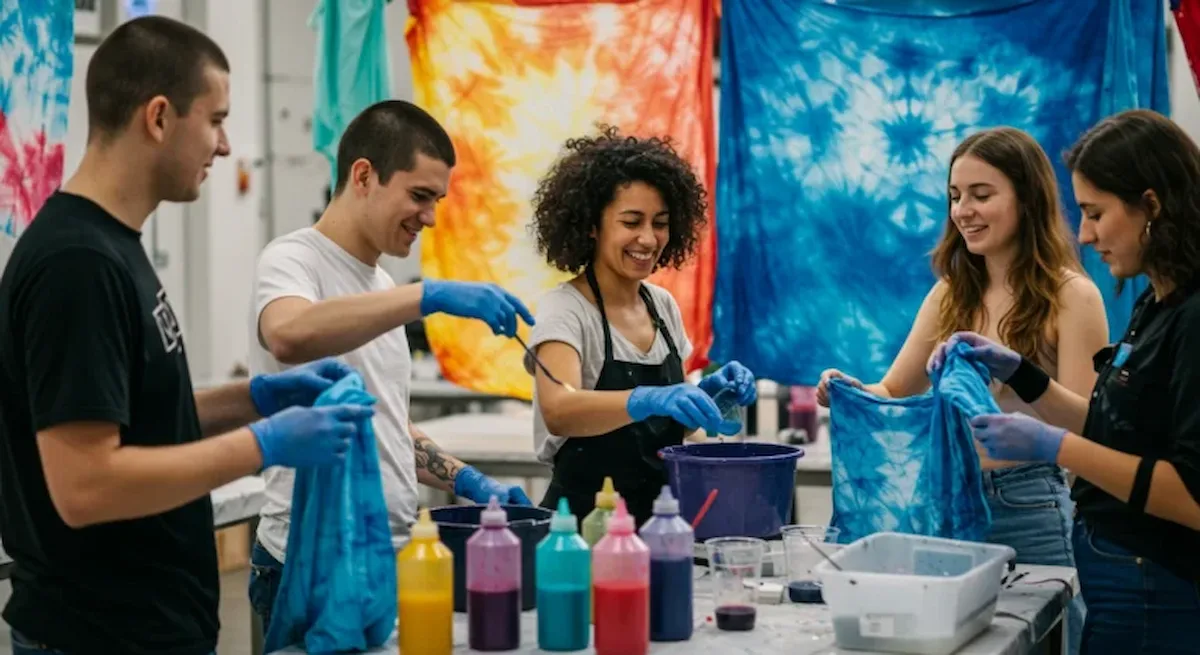
Are you looking for a fun, creative, and hands-on activity to try at home or with friends? A DIY dye workshop might be just what you need! Whether you’re a seasoned crafter or a complete beginner, hosting a DIY dye workshop is a fantastic way to explore the colorful world of fabric dyeing while creating unique, personalized items.
So, what exactly is a DIY dye workshop? It’s a gathering where participants learn various dyeing techniques, from classic tie-dye to intricate shibori, and apply them to fabrics like t-shirts, scarves, tablecloths, and more. The best part? You don’t need to be an expert to host or join one—just a willingness to experiment and have fun!
In this blog post, we’ll walk you through 10 creative projects to try at your next DIY dye workshop. From beginner-friendly tie-dye t-shirts to advanced natural dyeing techniques, there’s something for everyone. Plus, we’ll share tips on organizing a successful DIY dye workshop, including the materials you’ll need, safety precautions, and how to inspire creativity in your participants.
Ready to dive into the vibrant world of fabric dyeing? Let’s get started and turn your next DIY dye workshop into a colorful, unforgettable experience!
Why Host a DIY Dye Workshop?
Hosting a DIY dye workshop is more than just a creative activity—it’s an opportunity to bring people together, learn new skills, and create something truly unique. Whether you’re planning a home dyeing workshop for friends or organizing a larger event, here are some reasons why you should consider hosting one:
1.Unleash Your Creativity: A DIY dye workshop allows you to experiment with colors, patterns, and techniques in a fun, low-pressure environment. It’s a chance to explore your artistic side and create personalized items that reflect your style.
2.Perfect for All Skill Levels: Whether you’re a beginner or an experienced crafter, a DIY dyeing at home session can be tailored to suit your needs. You can start with simple projects like tie-dye t-shirts or challenge yourself with advanced techniques like shibori or ice dyeing.
3.Social and Collaborative: A DIY dye workshop is a fantastic way to connect with others. It’s a great activity for parties, team-building events, or even a relaxing afternoon with friends. Plus, everyone gets to take home their own handmade creations!
4.Eco-Friendly and Sustainable: Dyeing your own fabrics can be a sustainable alternative to buying new items. By upcycling old clothes or using natural dyes, you can reduce waste and create eco-friendly fashion.
5.Endless Inspiration: From bold, vibrant patterns to subtle, earthy tones, a DIY dye workshop offers endless dyeing inspiration. You can draw ideas from nature, art, or even your favorite fashion trends to create something truly unique.
Materials You’ll Need for Your Workshop
Before you dive into your DIY dye workshop, it’s important to gather the right dyeing tools and supplies. Here’s a list of essentials to get you started:
- Fabric Dyes: Choose high-quality dyes like Rit Dye or Jacquard for vibrant, long-lasting results. These brands offer a wide range of colors and types, including liquid, powder, and natural dyes.
- Fabrics to Dye: Opt for natural fibers like cotton, linen, or silk, as they absorb dye better than synthetic materials. Common items include t-shirts, tote bags, scarves, pillowcases, and tablecloths.
- Containers and Tools: You’ll need buckets, bowls, or squeeze bottles for mixing and applying dyes. Don’t forget rubber bands, clamps, or string for creating patterns in tie-dye or shibori techniques.
- Protective Gear: Dyeing can get messy, so make sure to have gloves, aprons, and old towels on hand to protect your clothes and workspace.
- Workspace Setup: Choose a well-ventilated area, preferably outdoors or in a space with easy-to-clean surfaces. Cover tables with plastic sheets or newspapers to prevent stains.
- Additional Supplies: Items like measuring cups, stirring sticks, and a washing machine (for rinsing dyed fabrics) will make the process smoother and more efficient.
With these dyeing materials ready, you’re all set to host a successful DIY dye workshop! In the next sections, we’ll explore some creative projects you can try, along with step-by-step instructions to help you get started.
Beginner-Friendly DIY Dye Projects
If you’re new to fabric dyeing, these beginner-friendly projects are the perfect way to kick off your DIY dye workshop. They’re simple, fun, and require minimal supplies, making them ideal for first-timers or anyone looking for a quick creative fix. Let’s dive into three easy projects that will add a splash of color to your life!
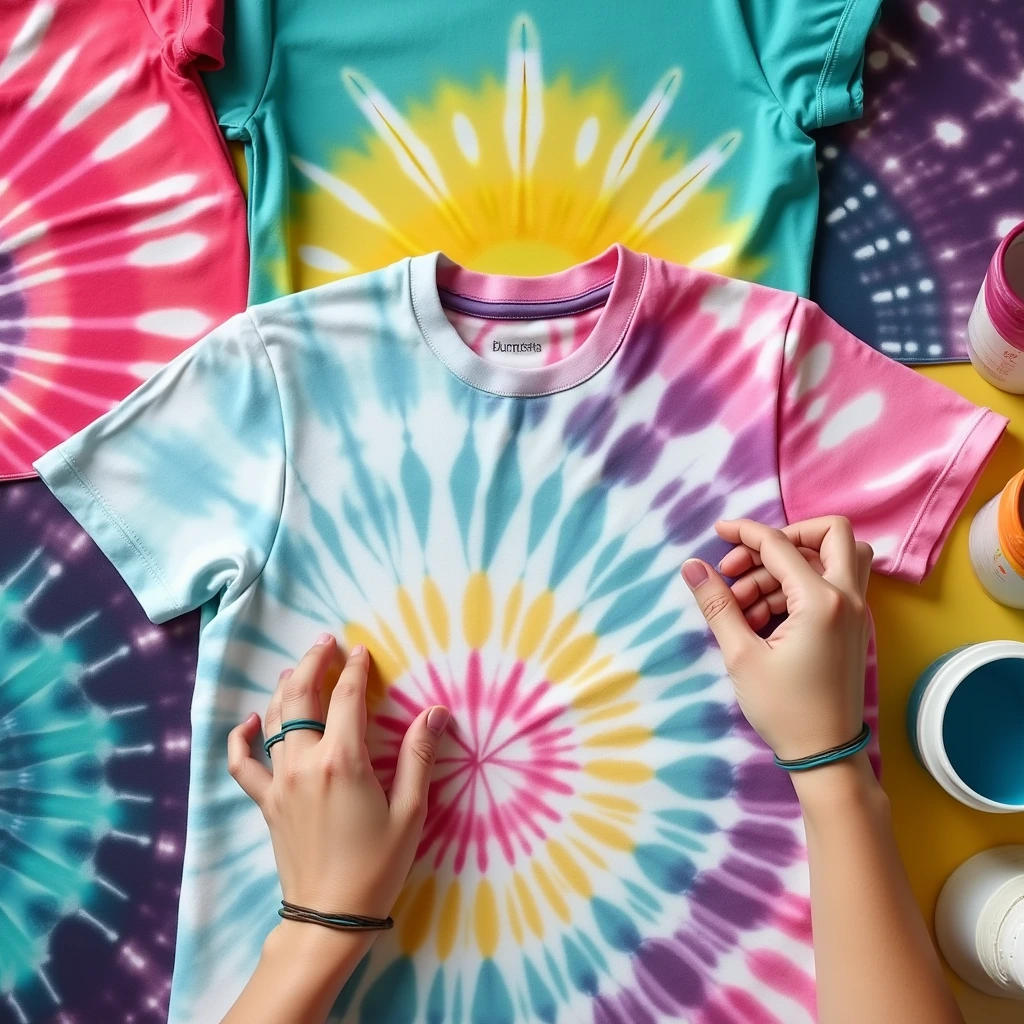
Tie-Dye T-Shirts: A Classic Favorite
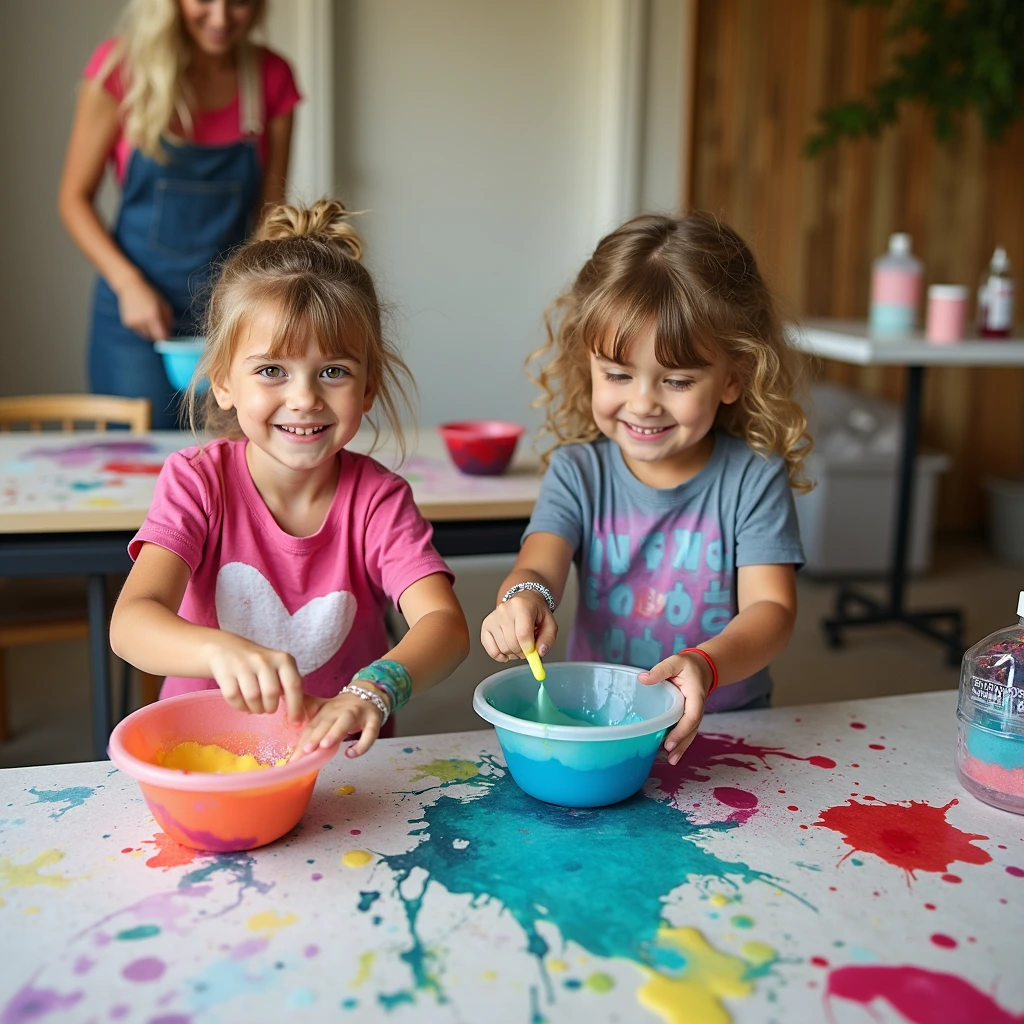
Tie-dye is a timeless technique that never goes out of style, and it’s a must-try at any DIY dye workshop. Whether you’re hosting a tie-dye workshop for kids or adults, this project is guaranteed to bring out everyone’s inner artist.
How to Get Started:
- Start with a plain cotton t-shirt (washed and damp).
- Twist, fold, or scrunch the fabric, then secure it with rubber bands to create your desired pattern.
- Apply tie-dye techniques by squirting or brushing dye onto the fabric. Popular patterns include spirals, bullseyes, and stripes.
- Let the dye set for 6-8 hours, then rinse and wash the shirt to reveal your vibrant design.
Why It’s Great for Beginners:
- Tie-dye is forgiving and doesn’t require precision, making it perfect for first-timers. Plus, the results are always unique and eye-catching!
- Pro Tip: Use a DIY fabric dyeing kit for easy-to-follow instructions and pre-mixed dyes.
Dip-Dye Napkins for a Pop of Color
Dip-dyeing is another beginner-friendly technique that’s perfect for adding a touch of color to everyday items. These colorful napkins are a great addition to any DIY dye workshop and make excellent handmade gifts.
How to Get Started:
- Choose plain cotton or linen napkins.
- Mix your dye in a tall container (a mason jar or bucket works well).
- Dip one end of the napkin into the dye, holding it in place for a few minutes to achieve your desired color intensity.
- For an ombre effect, gradually lift the fabric out of the dye, leaving the top section lighter.
- Rinse and wash the napkins to set the color.
- Why It’s Great for Beginners:
Dip-dye techniques are simple and require minimal tools, making them ideal for a home dyeing workshop. Plus, you can experiment with different colors and gradients. - Pro Tip: Use eco-friendly dyeing options like natural dyes made from beetroot, turmeric, or avocado pits for a sustainable twist.
Ombre Dye Scarves for a Gradient Effect
Ombre dyeing is a stunning technique that creates a smooth gradient effect, and it’s surprisingly easy to achieve at home. This project is perfect for adding a touch of elegance to your DIY dye workshop.
- how to Get Started:
- Choose a lightweight scarf made of natural fibers like cotton or silk.
- Mix your dye in a large container and submerge the scarf partially, leaving the top section undyed.
- Gradually lift the scarf out of the dye, creating a gradient effect.
- Let the dye set for the recommended time, then rinse and wash the scarf.
Why It’s Great for Beginners:
- Ombre dyeing at home is a simple yet impressive technique that yields professional-looking results. It’s also a great way to experiment with dyeing patterns and designs.
- Pro Tip: Check out online dyeing tutorials for step-by-step guidance and inspiration.
Intermediate DIY Dye Projects
Ready to take your dyeing skills to the next level? These intermediate projects are perfect for adding a touch of sophistication and creativity to your DIY dye workshop. From traditional Japanese techniques to modern ice dyeing, these ideas will inspire you to create stunning, one-of-a-kind pieces.
Tie-Dye T-Shirts: A Classic Favorite
Shibori is a traditional Japanese dyeing technique that involves folding, twisting, and binding fabric to create intricate patterns. A shibori tablecloth is a beautiful addition to any DIY dye workshop and a great way to explore this ancient art form.

How to Get Started:
- Choose a plain cotton or linen tablecloth.
- Fold, twist, or pleat the fabric, then secure it with rubber bands, clamps, or string. Popular shibori techniques include the kanoko (bound resist) and arashi (pole-wrapping) methods.
- Submerge the fabric in dye, ensuring the bound areas resist the color.
- Let the dye set, then rinse and wash the tablecloth to reveal your unique design.
- Why It’s Great for Intermediate Crafters:
- Shibori dyeing techniques require a bit more precision and patience than basic tie-dye, but the results are incredibly rewarding. Plus, it’s a fantastic way to add dyeing inspiration to your repertoire.
- Pro Tip: Experiment with different folding and binding methods to create a variety of patterns. This project is perfect for creative dyeing projects that showcase your artistic side.
Batik Pillow Covers with Wax Resist
Batik is a wax-resist dyeing technique that originated in Indonesia. It’s a versatile method that allows you to create intricate designs on fabric, making it ideal for custom pillow covers in your DIY dye workshop.
- How to Get Started:
- Choose plain cotton pillow covers.
- Use a tjanting tool or a brush to apply melted wax to the fabric in your desired pattern. The wax will resist the dye, creating a design.
- Apply dye to the fabric, either by dipping or painting.
- Let the dye set, then remove the wax by boiling the fabric or ironing it between paper towels.
- Why It’s Great for Intermediate Crafters:
Batik dyeing is a step up from basic techniques, offering endless possibilities for dyeing patterns and designs. It’s also a great way to explore dyeing techniques for beginners who are ready to try something new. - Pro Tip: Start with simple designs like geometric shapes or florals, then gradually move on to more complex patterns.
Ice Dyeing for Unique Patterns
Ice dyeing is a modern twist on traditional dyeing methods, and it’s perfect for creating unique, marbled effects. This project is sure to be a hit at your DIY dye workshop!
- How to Get Started:
- Why It’s Great for Intermediate Crafters:
Ice dyeing techniques are easy to learn but offer endless possibilities for creativity. The results are always unique, making it a fun and exciting addition to your DIY dye workshop ideas. - Pro Tip: Use a variety of colors to create vibrant, multi-tonal designs. This project is perfect for experimenting with different dyeing materials and techniques.
Advanced DIY Dye Projects
For those ready to push their creativity to the next level, these advanced projects are perfect for your DIY dye workshop. From natural dyeing to marbled designs, these techniques will help you create stunning, professional-quality pieces that are sure to impress.
Natural Dyeing with Plants and Vegetables
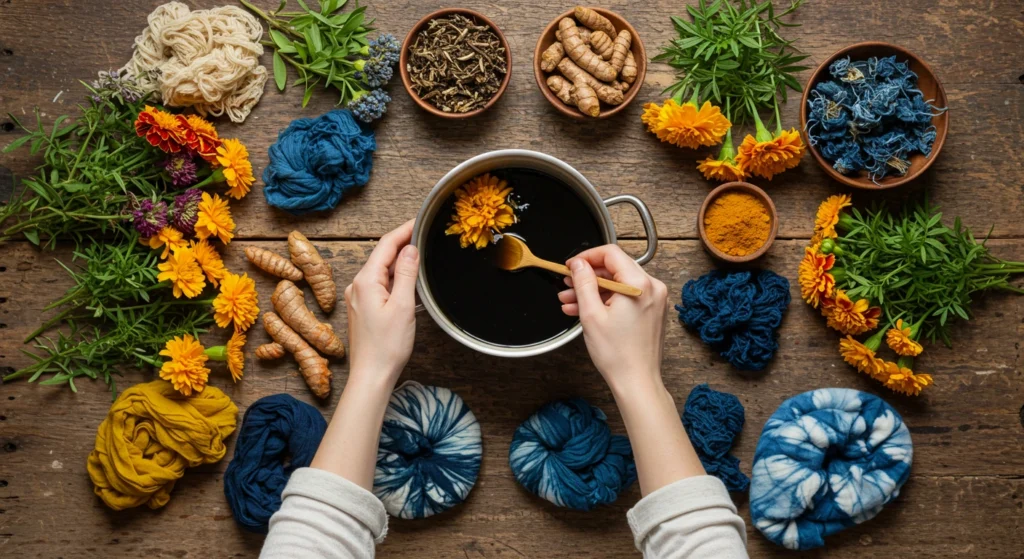
Natural dyeing is a sustainable and eco-friendly way to add color to your fabrics. Using ingredients like avocado pits, onion skins, and turmeric, you can create beautiful, earthy tones that are perfect for a DIY dye workshop focused on sustainability.
- How to Get Started:
- Choose your dye materials: avocado pits for pink, onion skins for orange, turmeric for yellow, and red cabbage for purple.
- Simmer the natural materials in water for about an hour to extract the dye.
- Strain the liquid and add your fabric (pre-treated with a mordant like alum to help the dye adhere).
- Simmer the fabric in the dye bath for an hour or until the desired color is achieved.
- Rinse and let the fabric dry.
- Why It’s Great for Advanced Crafters:
Natural dyeing techniques require a bit more preparation and experimentation, but the results are worth it. This project is perfect for those interested in eco-friendly dyeing and sustainability in dyeing. - Pro Tip: Experiment with different combinations of plants and vegetables to create a unique palette of colors. This project is a great way to explore natural dyeing techniques and add a sustainable touch to your DIY dye workshop.
Gradient Dye Curtains for a Stunning Look
Gradient dyeing creates a smooth transition of colors, making it ideal for large pieces like curtains. This project will add a stunning, artistic touch to any room and is a great addition to your DIY dye workshop.
- How to Get Started:
- Choose lightweight cotton or linen curtains.
- Mix your dye in a large container and submerge the bottom section of the curtain.
- Gradually lift the fabric out of the dye, creating a gradient effect.
- Let the dye set for the recommended time, then rinse and wash the curtains.
- Why It’s Great for Advanced Crafters:
Gradient dyeing requires precision and patience, but the results are breathtaking. This project is perfect for exploring dyeing patterns and designs and adding a professional touch to your DIY fabric dyeing projects. - Pro Tip: Use multiple colors to create a more complex gradient effect. This project is a great way to experiment with gradient dyeing and add a unique touch to your home decor.
Marbled Dye Journals for a Creative Touch
vMarbled dyeing is a fun and creative technique that creates unique, swirling patterns. This project is perfect for adding a personal touch to journals, notebooks, or even gift wrap in your DIY dye workshop.
- How to Get Started:
- Prepare a marbling bath by mixing carrageenan powder with water and letting it sit overnight.
- Drop dye onto the surface of the bath and use a skewer to create swirls and patterns.
- Dip your journal cover or paper into the bath, allowing the dye to transfer onto the surface.
- Let the dye dry, then seal it with a clear coat for durability.
- Why It’s Great for Advanced Crafters:
Marbled dyeing is a bit more complex but offers endless possibilities for creativity. This project is perfect for exploring marbled dyeing and adding a unique touch to your creative dyeing projects. - Pro Tip: Experiment with different color combinations and patterns to create one-of-a-kind designs. This project is a great way to add dyeing inspiration to your DIY dye workshop.
Tips for Hosting a Successful DIY Dye Workshop
Hosting a DIY dye workshop can be a fun and rewarding experience, but it does require some planning and preparation. Whether you’re organizing a small gathering at home or a larger event, these tips will help ensure your workshop runs smoothly and everyone leaves inspired.
Setting Up Your Workspace
A well-organized workspace is key to a successful DIY dye workshop. Here’s how to set up an efficient and creative environment:
- Choose the Right Location: Opt for a well-ventilated area, preferably outdoors or in a space with easy-to-clean surfaces like a garage or kitchen.
- Protect Surfaces: Cover tables with plastic sheets or old newspapers to prevent stains.
- Organize Supplies: Set up stations for dyeing, rinsing, and drying to keep the process streamlined. Provide each participant with their own set of dyeing tools and supplies, such as gloves, squeeze bottles, and rubber bands.
- Label Everything: Clearly label dyes, containers, and tools to avoid confusion during the workshop.
- Pro Tip: A good DIY dye workshop setup ensures that participants can focus on creativity rather than logistics.
Choosing the Right Dyes and Fabrics
The materials you choose can make or break your DIY dye workshop. Here’s what to consider:
- Dyes: High-quality dyes like Rit Dye and Jacquard are excellent choices because they offer vibrant colors and are easy to use. You can also explore natural dyes for an eco-friendly dyeing option.
- Fabrics: Natural fibers like cotton, silk, and linen absorb dye best. Provide a variety of items for participants to dye, such as t-shirts, tote bags, scarves, or pillowcases.
- Pre-Treatment: Make sure fabrics are pre-washed to remove any coatings that might resist dye.
- Pro Tip: Offering a range of fabrics and dyes allows participants to experiment and personalize their creations.
Safety Tips for Dyeing at Home
Safety should always be a priority when hosting a DIY dye workshop. Here’s how to keep everyone safe:
- Protective Gear: Provide gloves, aprons, and old towels to protect clothing and skin.
- Ventilation: Ensure the workspace is well-ventilated to avoid inhaling fumes from dyes.
- Clean-Up: Have a plan for disposing of leftover dyes and cleaning tools. Use eco-friendly cleaning products to minimize environmental impact.
- Allergies: Check with participants for any allergies or sensitivities to dyes or materials.
- Pro Tip: Emphasize dyeing safety at the start of the workshop to set a responsible tone.
Encouraging Creativity in Your Workshop
The goal of a DIY dye workshop is to inspire creativity and fun. Here’s how to keep the energy high and the ideas flowing:
- Provide Inspiration: Display examples of finished projects or share dyeing inspiration from social media platforms like Pinterest or Instagram.
- Encourage Experimentation: Remind participants that there’s no right or wrong way to dye—encourage them to try different creative dyeing projects and techniques.
- Offer Guidance: Be available to answer questions and demonstrate techniques, but let participants take the lead on their designs.
- Celebrate Results: At the end of the workshop, showcase everyone’s creations and celebrate their unique designs.
- Pro Tip: A positive and supportive atmosphere will make your DIY dye workshop ideas come to life and leave participants eager to return for future events.
Conclusion
Hosting a DIY dye workshop is a fantastic way to explore your creativity, connect with others, and create beautiful, personalized items. Whether you’re a beginner or an experienced crafter, there’s something for everyone in the world of fabric dyeing. Let’s take a moment to recap the 10 creative projects we’ve covered in this guide
")