
Ready to add instant shade and style to your home? With a DIY awning, you can upgrade any outdoor space on a budget—while choosing materials, structure, and features that fit your needs perfectly. This guide will show you how to build a custom awning step by step, so you get lasting comfort, curb appeal, and energy savings.
Basics of a DIY Awning: Materials, Structure, and Key Considerations
Building a diy awning starts with understanding the basics: material selection, structural design, and practical tips for long-term durability. Your choice of frame—whether metal, wood, or PVC—will affect the awning’s strength and weather resistance. Aluminum, steel, or cedar wood frames provide lasting durability and handle harsh weather. The roof or cover is usually made from polyester, plastic, or PVC-coated polyester for maximum water resistance and UV protection.
Stability is crucial: always use weight plates at the base or anchor points to prevent your diy awning from tipping or blowing away. Over time, fabric tops may need replacing, but most designs allow for easy swaps on the existing frame. Treat wood components with mold-resistant additives or paint, and apply waterproof sprays to fabrics. Rust-proof hardware is a must for longevity, especially in wet climates.
Types of DIY Awning Structures
When planning your diy awning, consider these main structure types:
Wall-Mounted Awnings
Fixed directly to a wall, these are space-saving and come in versatile shapes and sizes, ideal for windows, doors, and patios.
Free-Standing Awnings
Self-supporting designs that can be placed anywhere in your garden or yard. They offer flexible shading and are easy to move if needed.
Pop-Up Awnings
Four-legged, portable tents or canopies that are simple to set up and take down, perfect for temporary events or seasonal use.
Comparing Awning, Pergola, and Gazebo
- Awning/Canopy: Temporary and portable; best for shade but offers limited weather protection.
- Pergola: Semi-permanent with a partial roof for ventilation, can be attached or free-standing.
- Gazebo: Permanent, with enclosed roof and sometimes walls; offers full protection but lacks portability.
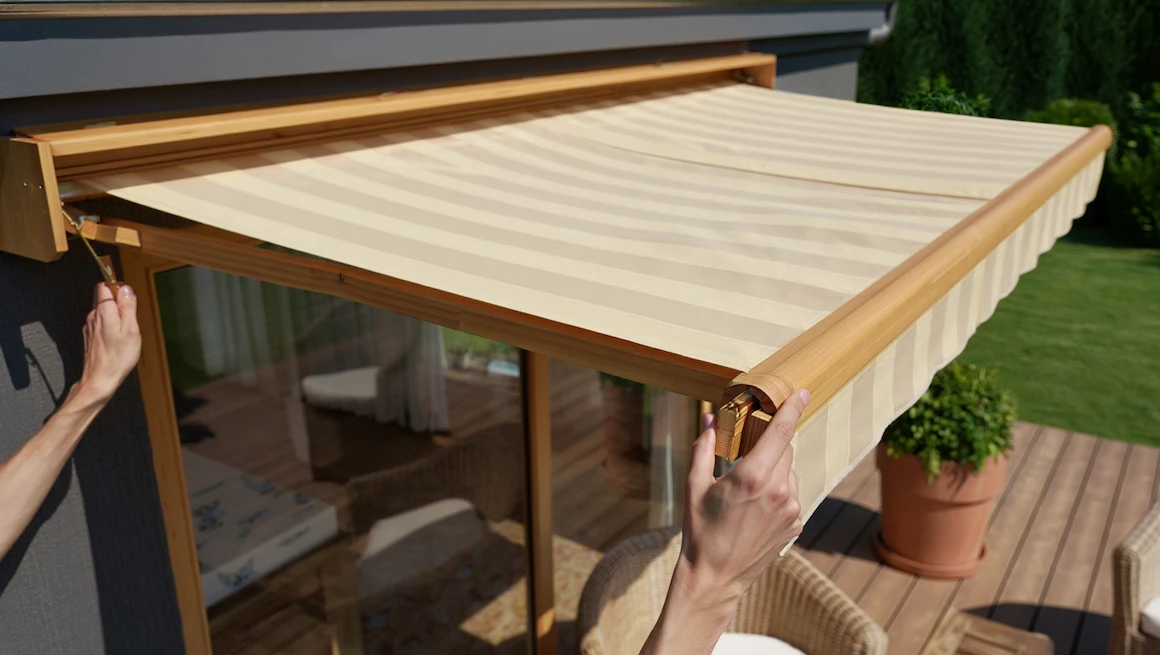
DIY Awning Retractable: Build Your Own Homemade Retractable Shade
A diy awning retractable is perfect for patios or decks where you want to control the amount of shade. Here’s how to make one:
Project Overview
A retractable awning opens for shade and closes for sun, offering flexible sun protection for outdoor rooms.
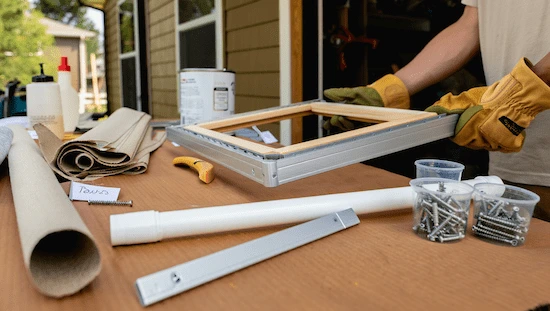
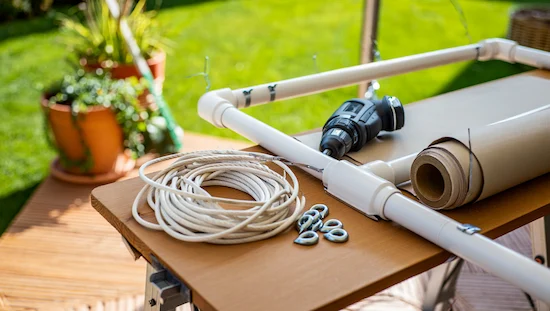
Materials Needed
- (8) 1″ diameter PVC pipes, 10′ long
- (16) 1″ PVC slip-on caps
- Spray paint, drill, measuring tape, marker
- Shade fabric: drop cloth, 15.5 yards sailcloth
- Sewing machine, scissors or rotary cutter, 3 spools white outdoor polyester thread
- Mounting hardware: (40) #8 eye screws, (2) 4″x4″x8′ posts, carriage bolts, washers, nuts, long 1/4″ drill bit
- (1) 2″x10″x12′ plank, (1) 2″x8″x12′ plank, (24) 3.5″ wood screws
- Paint or stain/sealer
- (10) #6 eye screws
- Cables & accessories: 90′ 3/32″ wire cable rope, (5) turnbuckles, (10) cable ferrules, swagging tool
Step-by-Step Instructions
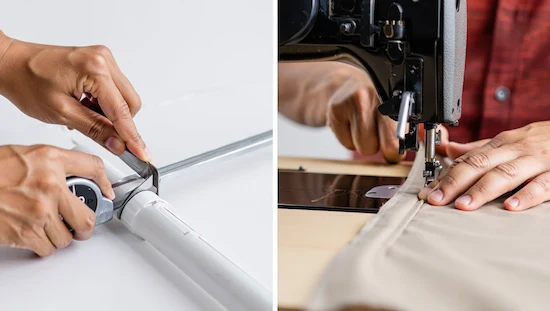
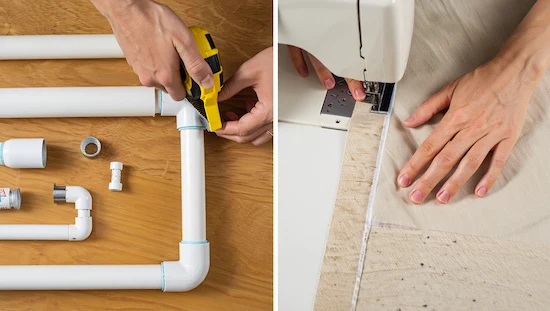
- Prepare the Rods: Mark PVC pipes at specified intervals, pre-drill holes for eye screws, spray paint rods/caps.
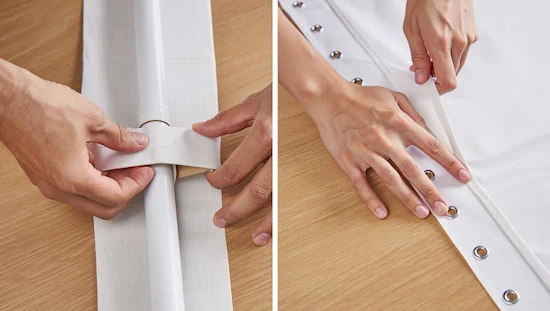
- Sew the Shade: Cut sailcloth into four panels, sew together, hem all sides, create 32 rod pockets, and sew onto shade.
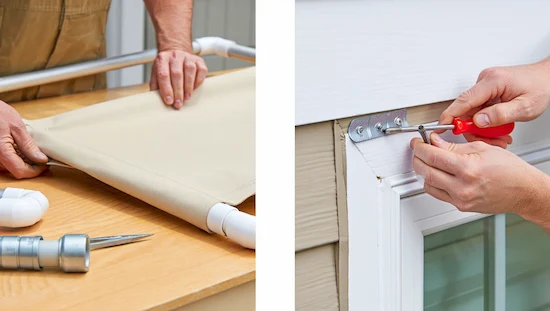
- Add Rods to the Shade: Slide rods into pockets, insert eye screws, add PVC caps.
- Build the Support: Attach posts to base, secure with carriage bolts, install boards for structure, paint/stain for protection.
- Install the Retractable Awning: Mark cable mounting points, install eye screws, cut and attach cables, thread through rods, use turnbuckles to tension.
Tips: Lightweight materials are easier to handle, but heavier fabric may need more support. The wire cable system enables smooth retracting. Always paint or seal wood for outdoor durability.
DIY Awning Ideas: From Preassembled Canopies to Custom Builds
Whether you want to customize a store-bought awning or start from scratch, here are some creative diy awning ideas:
DIY Awning Ideas for Preassembled Canopies
- Fairy Lights: Drape string lights or lanterns along posts for ambiance.
- Tropical Theme: Add beachy accents like swings, leaf-print pillows, or wave rugs.
- Hand-Painted Scenes: Paint a mural or beach scene on your awning for a unique touch.
DIY Awning Projects from Scratch
Canvas Cloth Awning
- Attach dyed canvas with grommets and cup hooks directly to a wall.
- Secure using ropes or ties.
- Choose darker shades for better sun blocking.
Tarp Awning
- Use a tarp with sturdy poles or PVC pipes for the frame.
- Secure with ropes, bungee cords, and heavy-duty stakes/anchors.
- Tools needed: hammer, saw, drill, PVC joints.
Backyard Canopy Bed
- Use timber bed posts for the frame and waterproof fabric for the cover.
- Bind posts to a sofa bed, sew cotton ropes to the fabric, and tie to the frame for a relaxing lounge spot.
Mosquito Net Awning
- Measure, cut, and attach netting with Velcro or hook-and-loop tape.
- Sew sections together and add curtain weights for stability.
Key Features to Consider for a Lasting DIY Awning
To ensure your diy awning stands the test of time, prioritize these features:
- Mold/Mildew Resistance: Treat wood with mold-resistant additives or paint. Choose mildew-resistant fabrics or treat standard cloth with a bleach solution (note: bleach can corrode metal tacks).
- Water Resistance: Use waterproof sprays for fabric and rustproof materials for frames.
- Corrosion-Proof Hardware: Stainless steel or rustproof screws and tacks are essential for humid/wet climates.
- Easy Replacement: Opt for designs that allow for quick fabric or component swaps.
Step-by-Step Instructions for a DIY Awning for Window
Step 1: Build the Frame
- Gather materials: 1/2″ PVC pipe, T-joints, elbows, PVC cutters, primer/cement.
- Measure your window width. For a 5′ window, use a 6′ frame (matches standard drop cloth width).
- Don’t make the awning wider than 6′ without extra support; a 3′ projection from the wall is about the max for stability.
- Dry-fit all parts before gluing.
Step 2: Prepare Awning Material
- Use a 6’x9′ canvas drop cloth with the plastic backing facing out.
- Size the canvas to cover the window and add a front flap if desired.
- Sew the edge using a sewing machine or alterations service (approx. $7).
- Invert the canvas so the exterior faces out.
Step 3: Assemble Awning
- Slide the finished canvas sleeve onto the PVC frame.
- Adjust for a taut fit, mark positions, then disassemble for final gluing.
- Prime and cement the joints, let dry, then reassemble.
- Attach unglued mounting elbows.
Step 4: Attach Canvas and Mount Awning
- Fasten the canvas with carpet tacks (stainless is better but more expensive).
- Mount using T-joints at upper corners and 3/4″ conduit clamps painted to match the house.
- Use #8 pan head screws (about 1″).
Step 5: Add Support Braces
- Cut PVC and elbows to set the awning at about a 45-degree angle for shade and window visibility.
- Braces can be dry-fit for easy removal during strong winds; gluing is optional.
Step 6: Completion
- The awning can be made in one afternoon (excluding shopping for materials).

Maintenance & Improvement Tips for Your DIY Awning
- Standard canvas may mildew in a month if humid—use mildew-resistant fabric for longer life.
- Bleach solution can help with mildew but may corrode metal tacks.
- Always use stainless or rustproof tacks/screws for durability in wet climates.
Cheap DIY Awning Ideas: Affordable Canopy Solutions for Every Home
When you’re on a tight budget, cheap diy awning ideas can offer shade, comfort, and style with minimal investment.
Project Overview
Goal: Make a low-cost awning to reduce indoor heat and energy bills.
Result: Reduced indoor temperature by about 3°F, with total cost around $20.
Materials & Costs
- Frame: 1/2″ PVC pipe, T-joints, elbows, PVC cutters, primer/cement
- Awning material: 6′ x 9′ canvas drop cloth (plastic backing out)
- Carpet tacks, 3/4″ conduit clamps, #8 pan head screws, spray paint
Step-by-Step Cheap Awning Build
- Build frame to match window width; dry-fit PVC parts.
- Use cheapest canvas drop cloth, sew into inside-out loop.
- Slide cloth onto frame, mark and cement fittings.
- Attach canvas to frame with tacks, mount to house with clamps and screws.
- Add supports for 45-degree angle; adjust for drainage.
- Project takes one afternoon; very affordable.
Best Cheap DIY Awning Designs
- Japanese-style shade cloth over basic frames
- Adjustable louvered roof awning (DIY metal slats)
- Metal mesh, pallet wood, and bamboo for rustic or modern styles
- Roll-up fabric shades for renters
- Solar-powered or LED-lit awnings
- Cantilevered frames or copper-look metal for style on a budget
Pros: UV protection, lower energy costs, privacy, visual appeal, and easy customization
Cons: More frequent maintenance, shorter lifespan, weather risks if not anchored
DIY Awning for Cars: Shade and Shelter on the Go
A diy awning car project is a portable, affordable solution for camping, road trips, and outdoor events.
Benefits
- Sets up in minutes; flexible, sturdy shelter
- Customizable to any vehicle size; typically 8′ x 10′ but adaptable
- Portable, rolls up for storage, easy to repair or replace
Drawbacks
- Requires setup effort; no built-in storage
- No walls (but can add)
- Fewer luxury features compared to electric models
Materials & Sizing
- Heavy-duty tarp with grommets
- 4 galvanized pipes (8 ft each) for legs and cross-bars
- Parachute cord, zip ties, clips/carabiners, tent stakes
- Optional: pipe sleeves, sandbags, adjustable tent poles
Assembly & Usage
- Assemble pipe frame with elbows.
- Attach tarp with zip ties.
- Use guy lines for tension and stability.
- Secure to car roof or rack.
- Anchor legs with stakes, adjust for water runoff.
- Packs up compactly for travel.
DIY Awning Frame: PVC and Wood Options
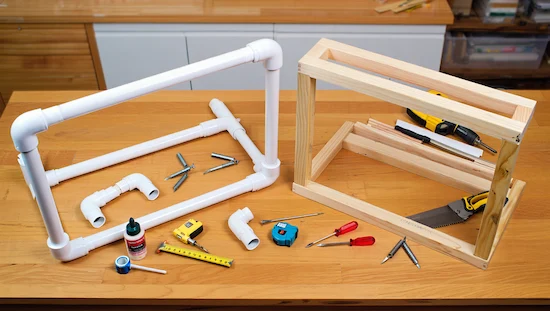
A. PVC Awning Frame (Low-Cost, Lightweight)
- Great for cooling houses by blocking sun and reducing AC use.
- Materials: 1/2″ PVC pipe, T-joints/elbows, cutters, primer/cement.
- Frame width matches window; max 3′ projection.
- Dry-fit and mark, then cement joints, assemble and mount with clamps/screws.
- Add braces for a 45-degree angle.
B. Wooden Awning Frame (Heavy-Duty, Permanent)
- Ideal for workshops or side buildings, no support posts needed.
- Use framing lumber (2×4), primer, screws, and corrugated metal roofing.
- Attach frame to studs, add strapping for roof panels.
- Prime/paint for durability; optimize cuts for least waste.
Tips: Always use corrosion-resistant fasteners. Head clearance and slope can be adjusted to fit space.
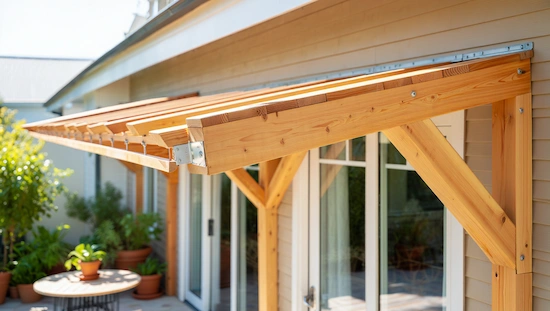
DIY Awning Wood: Elegant, Functional, and Durable
Project Overview
- Skill level: Intermediate
- Time: 4–8 hours (1–2 days total)
- Cost: $100–$300
- Wood awnings provide both function and beauty for patios, decks, or side buildings. Custom sizes and coverings (fabric, corrugated plastic/metal) are easy to achieve.
Safety Considerations
- Always use power tools with eye and hearing protection.
- Use a ladder safely; recruit a helper when lifting frames.
Materials & Tools
- Miter saw, tape measure, square, caulking gun, drill, level, safety gear
- Exterior-grade 2×4 lumber, screws, lag bolts, caulking, wood filler, primer/paint/stain, covering material
Step-by-Step Wood Awning Build
- Locate wall studs for the ledger and braces.
- Measure and cut ledger/fascia boards, add extra for rafters.
- Mark rafter layout; space every 24″.
- Cut rafters, attach to ledger/fascia with screws.
- Mount frame with lag bolts into wall studs; check for level.
- Add diagonal braces with screws and lag bolts.
- Cut/attach covering to frame.
- Caulk and fill as needed, then prime/paint/stain.
Workshop Example
- Wall-mounted wood frame, 20-degree roof slope, no support posts, uses corrugated metal roofing.
Pro Tips:
- Best woods: cedar, pine, redwood.
- Alternative coverings: awning fabric, plastic, or metal.
- Awnings can extend 20–30 feet with proper pitch.
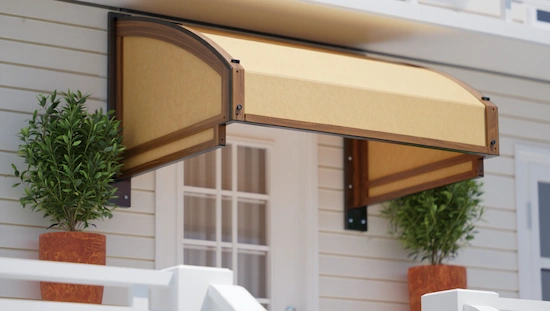
DIY Awning Over Door: Protecting Your Entryway
Prefab & Kit Options
- Domed Awning Kit: Features smart locking, slide-in panels, and weather-resistant hardware for many surfaces.
- Metal Standing Seam Awning: Fixed aluminum frame, stainless steel hardware, various matte colors, weather-resistant, step-by-step instructions.
- Modular Aluminum Entry Awning: Commercial-grade, strong winds/snow, modular framework, many colors, wall-mount Z-brackets.
- Polycarbonate Canopy: UV-filtering panels, rust/corrosion-resistant, all hardware included.
- Retractable Door Canopy: Manual open/close, fits most doors, easy assembly.
DIY Wood & Metal Awning Over Door (Step-by-Step)
- Mount support 2x4s to siding.
- Cut and attach angled supports (45-degree ends).
- Build roof frame; secure with hurricane straps.
- Install galvanized steel roofing; use silicone for waterproofing.
- Seal where awning meets house with caulk.
- Always anchor brackets to studs for stability.
Additional Tips:
- Kits come with manuals for concrete, brick, stone, wood, or composite.
- Choose weather-resistant fasteners.
- Match colors/shapes for curb appeal.
- UV-resistant panels last longer.
People Also Ask (FAQ)
1. How can I build a diy awning for my window?
To build a diy awning for window, measure the window, build a PVC or wood frame, sew or fit a canvas/tarp cover, and mount it above the window with clamps or brackets. Add angled braces for strength and use mildew-resistant fabrics .
2. Is a diy awning cheaper than a pergola?
Yes. DIY awnings are generally much cheaper than pergolas, especially if you use affordable or reclaimed materials for the frame and cover .
3. What is the best material for a diy awning frame?
PVC pipe is excellent for budget and portability, while cedar or pressure-treated wood is best for permanent, heavy-duty frames. For more durability, always choose rust-proof hardware.
4. How do I make a retractable diy awning?
Create a frame with PVC or wood, sew fabric panels, and use wire cable or rope systems so the shade slides open and closed. The right hardware ensures smooth retracting.
5. Where can I find cheap diy awning materials?
Shop at home improvement stores, hardware shops, online retailers, or upcycle reclaimed building materials for your diy awning needs.
Conclusion: Start Your DIY Awning Project Today
A diy awning can transform your home, backyard, or travel experience—delivering style, shade, and savings with simple, step-by-step builds. Whether you’re interested in cheap diy awning ideas, diy awning retractable for patios, a diy awning frame, or a wood awning over door, this guide gives you everything you need for a successful project. Use the detailed instructions, safety tips, and best practices provided to create a long-lasting, attractive addition to your home.
")