
Keeping your kids safe while they sleep shouldn’t be a challenge. That’s where a DIY bunk bed safety net comes in. Whether you’re a hands-on parent or just looking for a budget-friendly solution, creating a DIY bunk bed safety net is a smart and practical way to prevent falls and injuries from the top bunk.
This simple yet effective project gives you peace of mind, knowing your child is protected with a custom-fit safety net you can make yourself. In this post, we’ll guide you through everything you need to build your own DIY bunk bed safety net, from choosing the right materials to installing it securely. Ready to turn your child’s bunk bed into a safer space? Let’s get started!
Why a DIY Bunk Bed Safety Net Is Essential for Child Safety
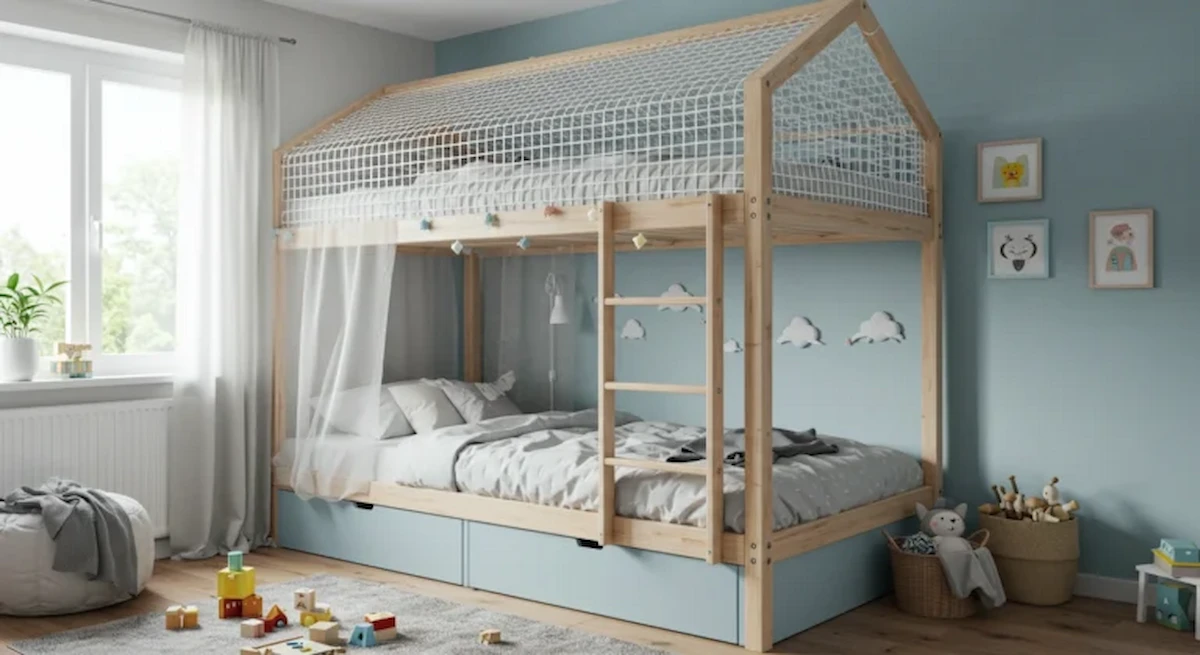
Bunk beds are a fun and space-saving option for families, but they also come with serious safety risks—especially for young children. A DIY bunk bed safety net is a practical solution that helps prevent accidental falls, protects active sleepers, and gives parents peace of mind. With the right materials and a bit of creativity, you can build a safety net that fits your bunk bed perfectly and keeps your kids safe without sacrificing comfort or design. Let’s explore the specific reasons why installing a DIY bunk bed safety net is a must for any family with bunk beds.
🛡️ Examples of Why a DIY Bunk Bed Safety Net Matters:
- Prevents Dangerous Falls: Children, especially toddlers, tend to move a lot in their sleep. A DIY bunk bed safety net acts as a soft barrier that keeps them from falling off the top bunk.
- Supports Nighttime Movement: For kids who roll over or sleep near the edge, a well-placed DIY bunk bed safety net ensures they stay safely in place all night.
- Encourages Safe Playtime: Kids often turn their beds into play zones. A DIY bunk bed safety net reduces the risk of injury when they’re climbing, bouncing, or playing with toys on the top bunk.
- Cost-Effective Childproofing: Unlike expensive pre-made guards, a DIY bunk bed safety net allows you to customize safety features using affordable, child-safe materials.
🧸 Creative Add-Ons That Kids Will Love:
- Stuffed Animal Pockets: Sew small pockets into the safety netting to store plush toys or bedtime buddies.
- Glow-in-the-Dark Stars: Add glow stickers or soft LED strips to make the net more fun and comforting at night.
- Themed Decorations: Use fabric or trim that matches your child’s favorite theme (e.g., space, jungle, or unicorns).
- Clip-On Toy Holders: Attach safe, soft clips to hold storybooks, dolls, or bedtime toys within easy reach.
A DIY bunk bed safety net is more than just a safety measure—it can be part of a fun and creative bedroom space your child will love. In the next section, we’ll show you exactly what tools and materials you’ll need to start building one.
What You’ll Need: Tools and Materials for Your DIY Safety Net
Before you begin building your DIY bunk bed safety net, it’s important to gather the right tools and materials to ensure your project is safe, durable, and child-friendly. Creating a safety net for your child’s bunk bed doesn’t have to be expensive or complicated. With a few basic items and a little creativity, you can design a net that provides both protection and personality. Below is a detailed list of recommended materials, handy tools, and creative add-ons to help you build the perfect DIY bunk bed safety net.
🧰 Essential Tools and Supplies
These core items will help you securely install a strong, reliable DIY bunk bed safety net:
- Mesh netting or nylon net fabric: Choose a strong, breathable material that can handle pressure without tearing. Look for options marketed as pet or child safety netting.
- Zip ties or Velcro straps: These are perfect for attaching the net to the bunk bed frame without drilling. They’re adjustable, easy to remove, and won’t damage the bed.
- Screw-in hooks or adhesive mounts: If you want a more permanent installation, these can help anchor the net tightly to wood or metal frames.
- Measuring tape: Accurate measurements ensure the net fits snugly around the bunk bed and offers full coverage.
- Scissors or utility knife: For trimming netting and cutting Velcro or tape to size.
- Marker or chalk: To mark placement points on the bed frame for net attachment.
🎨 Optional Add-Ons and Creative Ideas
Take your DIY bunk bed safety net to the next level with these fun and functional extras:
- Colorful fabric edging: Add padded or patterned trim to soften the edges of the net and make it visually appealing.
- Pockets for bedtime toys: Sew or glue small cloth pouches onto the inside of the net to store stuffed animals, mini books, or flashlights.
- Glow-in-the-dark tape or stars: These can be added to the netting or bed frame to help your child feel secure at night.
- Clip-on organizers: Attach soft toy baskets or hanging storage clips for dolls, plushies, or bedtime essentials.
🧸 Kid-Friendly Toys and Safety Accessories to Include
Integrating comfort and safety into your DIY bunk bed safety net project makes the sleeping space even more enjoyable:
- Stuffed animals or plush toys — store safely in sewn-on mesh pockets
- Small LED nightlights — clip onto the frame for low-light visibility
- Soft sensory toys — hang from the netting to add interactive bedtime fun
- Bedtime storybooks — tuck into corner pockets for easy access
With these materials and creative add-ons, your DIY bunk bed safety net will be both functional and fun. In the next section, we’ll walk you through the step-by-step process of installing your safety net to keep your child safe and secure.
Step-by-Step Guide to Building and Installing a Bunk Bed Safety Net
Now that you’ve gathered all your tools and materials, it’s time to bring your DIY bunk bed safety net to life. This simple project can make a huge difference in your child’s safety, especially if they sleep on the top bunk. With this step-by-step guide, you’ll learn how to measure, build, and securely install a bunk bed safety net that not only prevents falls but also adds a fun and personal touch to your child’s sleep space. Whether you’re a DIY pro or a beginner, this guide breaks it down in a clear and easy-to-follow way.
🪚 Step 1: Measure the Bunk Bed Frame
- Use a measuring tape to determine the length, width, and height where the DIY bunk bed safety net will be installed.
- Focus on the open sides of the top bunk—this is where the net will act as a barrier.
- Make sure to note the bed’s structure (metal vs. wood) so you can choose the right mounting method.
🧵 Step 2: Cut the Netting Material to Size
- Lay your mesh netting flat on a clean surface.
- Cut it according to your measurements, leaving a little extra margin for flexibility.
- Use sharp scissors or a utility knife for clean edges and smoother installation.
🔗 Step 3: Attach the Net to the Frame
Choose your preferred attachment method based on your bed frame:
- Zip ties or Velcro straps: Ideal for a no-drill solution. Wrap around slats or rails and pull tight.
- Screw-in hooks or eyelets: Best for a permanent setup. Attach the hooks to the frame, then tie or loop the net securely.
- Adhesive mounts or clips: Suitable for light-duty setups or rentals (avoid damaging surfaces).
Make sure the DIY bunk bed safety net is taut and firmly secured at all edges to prevent gaps or sagging.
🔍 Step 4: Safety Check and Adjustments
- Check the tension of the net by pressing lightly on various points—it should hold without giving way.
- Make sure there are no sharp edges or exposed ties where a child could get caught.
- Do a full visual inspection each time you change bedding or clean the area to ensure everything stays secure.
🎨 Step 5: Add Personal Touches and Toys
- Glow-in-the-dark stickers or soft LED fairy lights around the net can comfort kids at night.
- Attach plush toy holders or pouches to the inside of the net for bedtime favorites.
- Customize with your child’s name, favorite colors, or themed decorations to make the DIY bunk bed safety net feel like part of their world.
A properly installed DIY bunk bed safety net gives you peace of mind and gives your child a safe, cozy space to sleep and play. It’s a small project with a big impact—and one you can finish in an afternoon.
Creative DIY Bunk Bed Safety Net Ideas for Kids’ Rooms
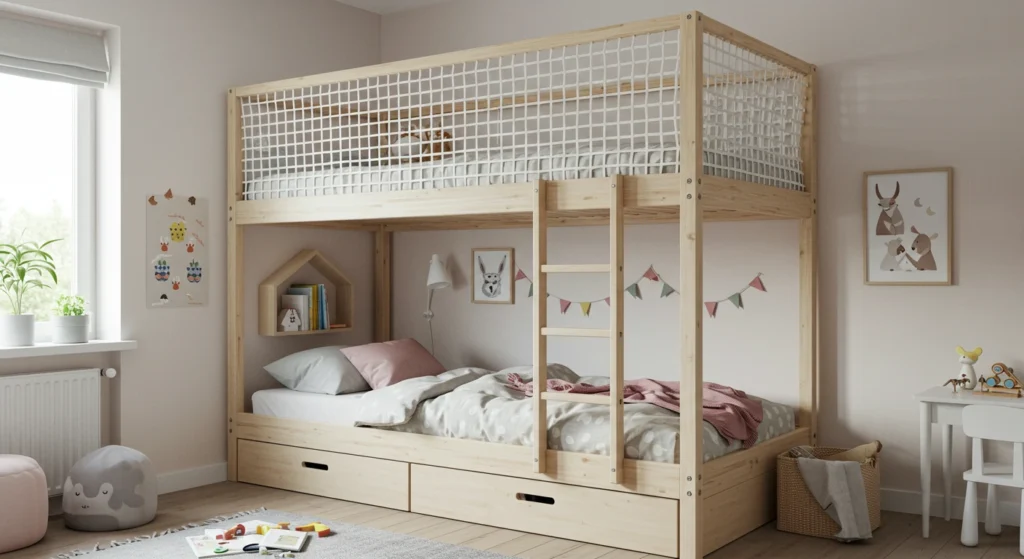
A DIY bunk bed safety net doesn’t have to look boring or industrial—it can actually enhance the look and feel of your child’s room while keeping them safe. With a little imagination, you can turn a basic safety feature into something playful, colorful, and totally kid-approved. Whether you want to match the bedroom’s theme or add functional accessories like pockets and lights, there are countless ways to personalize your DIY bunk bed safety net to suit your child’s needs and interests.
Here are some fun and creative ideas to spark inspiration for your project.
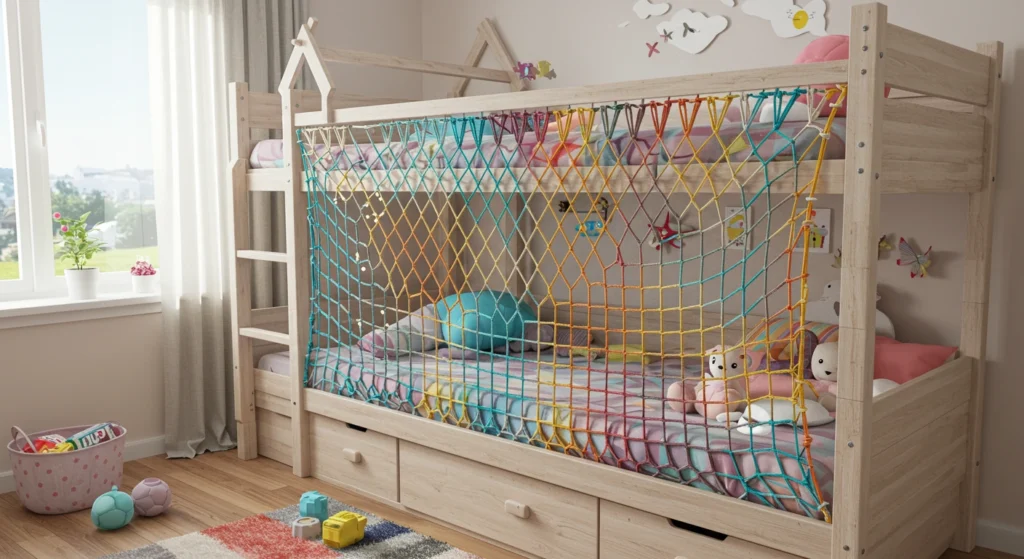
Themed Safety Net Designs
- Jungle Adventure: Use green mesh netting with hanging vines and stuffed jungle animals clipped to the sides.
- Under the Sea: Blue netting with fish-shaped felt cutouts, bubbles, and glow-in-the-dark sea creatures.
- Outer Space: Add star decals and soft LED lights to create a galactic effect around the DIY bunk bed safety net.
- Princess Castle: Use light pink or purple fabric netting with soft ruffles or faux “curtains” tied back at each corner.
🧸 Built-In Toy and Storage Features
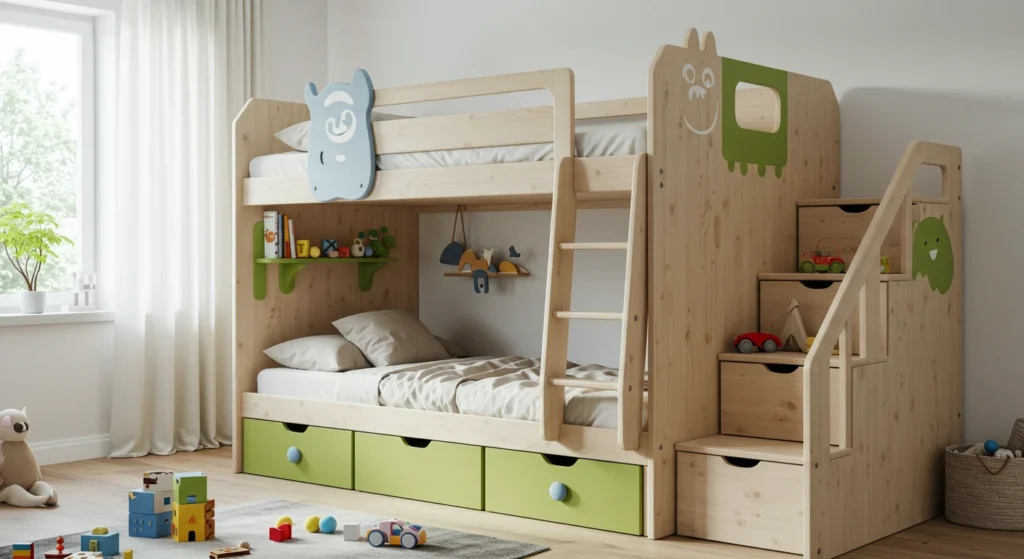
- Toy Pockets: Sew or clip small mesh or fabric pockets along the inside of the net to hold stuffed animals, bedtime storybooks, or sensory toys.
- Mini Toy Hammocks: Hang a soft hammock under the top bunk for light plush toys—great for both safety and playroom organization.
- Clip-On Plushies: Attach your child’s favorite soft toys to the net using child-safe clips or Velcro loops for a comforting nighttime companion.
💡 Lighting and Visual Effects
- LED Strip Lights: Wrap soft, battery-operated LED strips around the edges of the net for a magical glow effect at night.
- Glow-in-the-Dark Accents: Use star, moon, or themed stickers that absorb light during the day and shine softly at night.
- Name Signs or Banners: Personalize the DIY bunk bed safety net with a name banner or hand-painted sign your child can help decorate.
🎨 Decorative Fabric and Embellishments
- Patterned Edge Trim: Add decorative bias tape or padded trim in fun patterns like polka dots, stars, or animals to make the net pop.
- Color-Coordinated Ties or Straps: Use ties in your child’s favorite colors to attach the net securely while adding visual flair.
- Themed Fabric Panels: Add panels with cartoon characters, dinosaurs, or fairy tale scenes to customize the space.
A creative DIY bunk bed safety net not only protects your child—it becomes a feature they’re excited about. With thoughtful touches and a bit of crafting fun, you can build a space that’s safe, comforting, and uniquely theirs.
Bunk Bed Safety Tips Every Parent Should Know
Even with a well-installed DIY bunk bed safety net, overall safety depends on consistent habits and smart precautions. As a parent, understanding key bunk bed safety tips can help prevent accidents and create a secure sleeping environment for your child. From setting house rules to performing regular inspections, these practices work hand in hand with your DIY bunk bed safety net to ensure the highest level of protection. Below are essential safety tips every parent should follow to keep kids safe and sound—both day and night.
🛑 Set Clear Safety Rules
- Top Bunk Age Limit: Only allow children over the age of 6 to sleep in the top bunk. Younger children are at a higher risk of falling, even with a DIY bunk bed safety net in place.
- No Rough Play: Teach kids that the bunk bed is for sleeping, not for jumping or playing games that could lead to falls.
- Climbing Restrictions: Instruct children to only use the ladder to go up or down—no climbing on the frame or over the net.
🔧 Inspect and Maintain Regularly
- Check the Net Tension: Make sure your DIY bunk bed safety net is still tightly secured and free from tears or fraying.
- Tighten Hardware: Inspect all bolts, screws, and bed joints monthly to prevent wobbly or unstable frames.
- Watch for Wear and Tear: Look out for signs of damage in both the bed and the safety net—especially if your kids are active sleepers.
🧸 Enhance Safety with Child-Friendly Accessories
- Soft Bedding and Padding: Add plush or foam bumpers along the bunk bed rails and around the safety net’s edges for extra cushioning.
- Nightlights or LED Strips: Install soft lighting near the bed to help children safely climb down at night.
- Toy Storage Safety: Avoid placing heavy or hard toys on the top bunk, as these could fall or create tripping hazards.
🛏️ Choose the Right Mattress and Bed Setup
- Low-Profile Mattress: Use a thinner mattress on the top bunk to maintain proper rail height and leave room for the DIY bunk bed safety net.
- Secure Ladder: Make sure the ladder is attached firmly and has non-slip steps for safe climbing.
- Stable Base: Position the bunk bed in a corner if possible, with the DIY bunk bed safety net covering any open sides.
🧠 Teach Your Child About Bunk Bed Safety
- Explain the Purpose of the Safety Net: Help your child understand how their DIY bunk bed safety net keeps them safe and why it’s important not to pull or play with it.
- Encourage Responsibility: Involve your child in daily safety checks—like making sure the net is intact or the ladder is clear.
By following these simple yet crucial tips, your DIY bunk bed safety net becomes part of a broader, more effective child safety strategy. When combined with thoughtful design, regular maintenance, and smart parenting practices, bunk beds can be a secure and exciting part of any child’s room.
conclusion:
Creating a DIY bunk bed safety net is one of the smartest and most affordable ways to protect your children from unnecessary accidents. Not only does it provide a secure barrier to prevent falls, but it also adds a personalized touch to your child’s sleeping area. Whether you’re using simple mesh and zip ties or customizing with themed decorations and toy pockets, a DIY bunk bed safety net can be both functional and fun.
By following the steps and safety tips in this guide, you’ll build more than just a net—you’ll build peace of mind. Remember, child safety starts with small, thoughtful actions, and this project is a perfect example of how DIY solutions can make a big impact.
Start today and transform your kids’ bunk bed into a safer, cozier, and more creative space with your very own DIY bunk bed safety net!
")