
Upgrading your home doesn’t have to be expensive or complicated—sometimes, a small change like adding new trim can make a big impact. That’s where diy door trim comes in. With just a few affordable materials and some creativity, you can transform plain doorways into eye-catching features that enhance your home’s style.
Whether you’re aiming for a modern, farmhouse, or classic look, there are countless ways to update your doors and add value without breaking the bank. In this guide, you’ll discover 15 inspiring diy door trim ideas that are simple enough for beginners, yet impressive enough to wow your guests. Get ready to learn about budget-friendly materials, expert tips, and the step-by-step process to create the perfect finishing touch for any room.
Why Upgrade with DIY Door Trim? (Benefits & Budget-Friendly Advantages)

Giving your home a fresh new look doesn’t always mean tackling major renovations or spending a fortune. Sometimes, small updates can make the biggest impact. Upgrading your space with diy door trim is one of the most effective, affordable, and creative ways to transform any room. Not only does it add a polished, custom finish to your doors, but it also allows homeowners to express their unique style, boost property value, and embrace more eco-friendly solutions—all while sticking to a budget.
Key Benefits and Real-World Advantages
- Affordable Home Transformation: Instead of paying for expensive contractors or custom carpentry, you can install new door trim yourself using budget-friendly materials from trusted retailers like Home Depot, Lowe’s, or IKEA.
- Customization and Creativity: DIY door trim lets you choose from countless design options, from sleek modern styles to classic farmhouse looks, ensuring your doors match your personal taste and overall home décor.
- Energy Efficiency: Properly installed trim can help seal gaps and prevent drafts, making your home more energy-efficient and reducing heating or cooling costs—an easy win for both your wallet and the environment.
- Sustainable Choices: By using eco-friendly materials, repurposed wood, or low-VOC paints, you contribute to climate action and corporate responsibility while giving new life to existing resources.
- Increased Home Value: Clean, well-installed trim makes any room look finished and inviting, which can be a selling point for potential buyers or renters.
- Skill Building and Satisfaction: Taking on a diy door trim project helps you learn new skills, fosters a sense of accomplishment, and encourages more home improvement projects down the road.
With these advantages, it’s clear why more homeowners are choosing to refresh their spaces with custom, budget-friendly door trim.
Essential Tools & Materials for Stunning DIY Door Trim Projects
Before you dive into any diy door trim project, having the right tools and materials on hand is key to achieving a polished, professional look. Whether you’re a seasoned DIY enthusiast or just starting out, investing in quality supplies will make your trim installation smoother, faster, and more enjoyable. Choosing durable, sustainable materials not only supports your project goals but also aligns with responsible, climate-conscious home improvement practices.
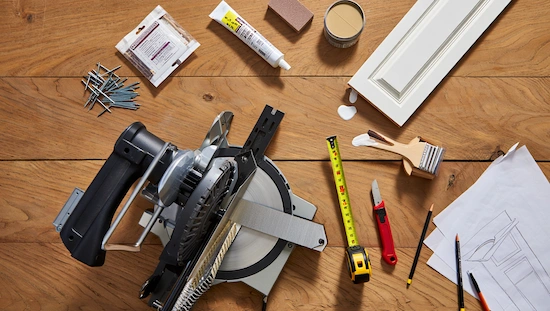
Must-Have Tools
- Miter Saw: Achieve precise, clean angle cuts for perfect corners and joints.
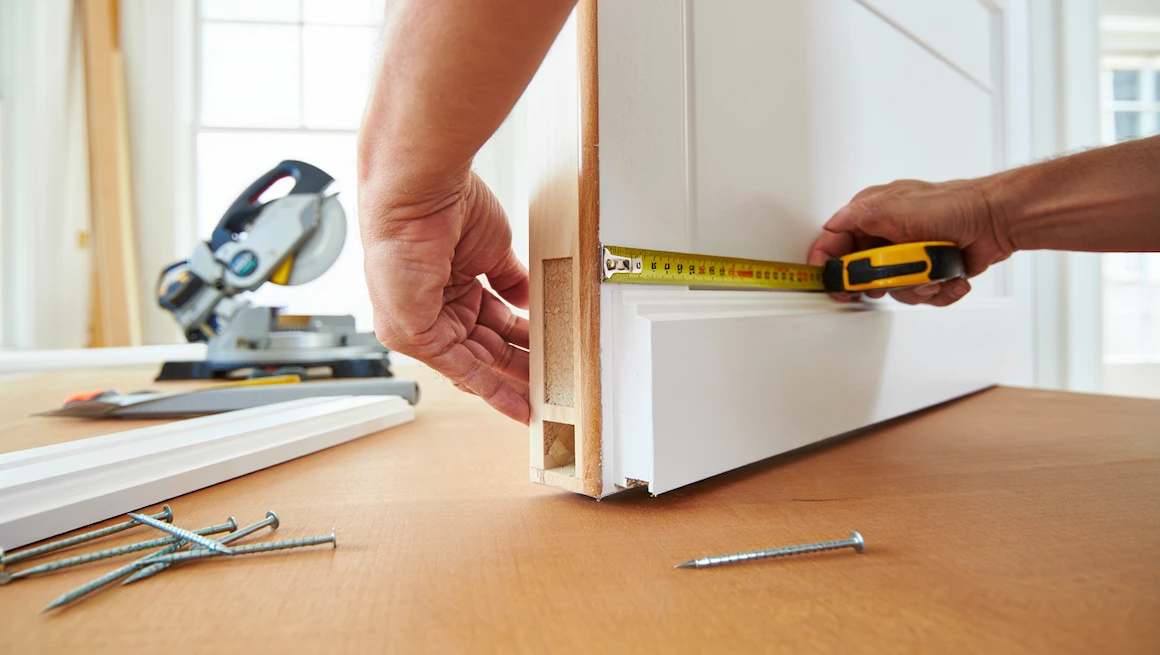
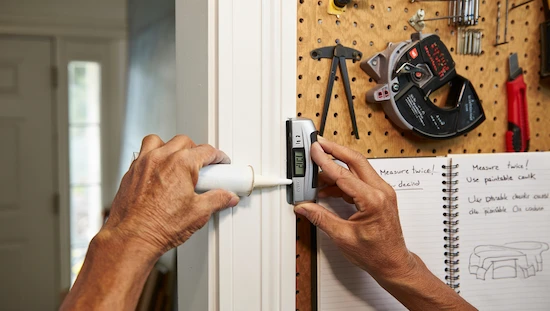
- Measuring Tape & Pencil: Accurate measurements are crucial for a snug fit and seamless finish.
- Level: Ensure every piece of trim is perfectly straight for a high-end appearance.
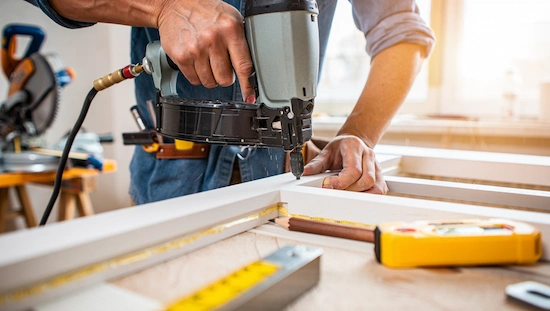
- Nail Gun or Hammer: Secure trim quickly and safely with finishing nails.
- Caulk Gun: Seal gaps for a smooth, professional look while improving energy efficiency.
- Safety Gear: Always use goggles and gloves to protect yourself during cutting and installation.
Recommended Materials
- Trim Boards: MDF, pine, or even reclaimed wood are popular, budget-friendly choices. Consider pre-primed options for easier painting.
- Finishing Nails: Opt for quality fasteners that won’t bend or rust.
- Wood Filler or Caulk: Hide nail holes and seal edges for a flawless result.
- Paint or Stain: Choose low-VOC or eco-friendly finishes to minimize your project’s environmental impact.
- Adhesive: For extra hold, especially in high-traffic areas or older homes.
Practical Tips
- Shop for trim supplies at Home Depot, Lowe’s, or IKEA for a wide range of affordable, sustainable options.
- Reuse leftover or salvaged wood trim from previous projects to save money and reduce waste.
- Watch YouTube tutorials or check resources like HGTV and DIY Network for visual guides and expert advice.
By gathering the right tools and materials before you begin, your diy door trim project will be faster, more efficient, and even more rewarding.
15 Creative DIY Door Trim Ideas for Every Room
A new look for your doors can instantly transform any space, and with a bit of imagination, you can find the perfect style to suit every room in your home. From bold farmhouse finishes to sleek modern accents, these ideas prove that updating with diy door trim is not only budget-friendly but also a chance to personalize your living space while supporting eco-friendly, responsible home improvement.
Inspiring Ideas for Your Next Project
- Classic Craftsman Style: Add architectural interest to entryways and living rooms with wide, flat trim boards and bold header details for a timeless look.
- Farmhouse Shiplap Trim: Use shiplap boards for rustic door frames that bring charm to kitchens, mudrooms, or laundry rooms. Try reclaimed wood for a sustainable touch.
- Modern Minimalist: Achieve a clean, contemporary vibe with slim, flat-stock trim painted to match your wall color—perfect for bedrooms and hallways.
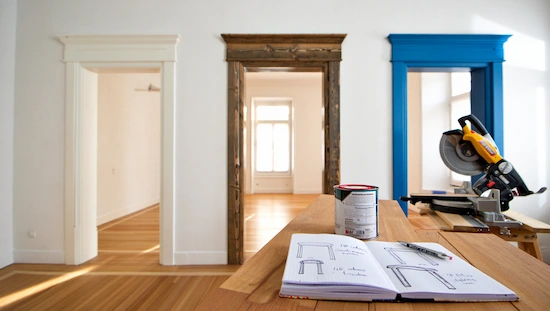
- Bold Color Contrast: Paint your door trim a dramatic shade, such as navy or black, to create a statement in any space and highlight your doors as a design feature.
- Geometric Accents: Combine angles and stacked moldings for a unique, artistic touch in playrooms or creative workspaces.
- Scandinavian Simplicity: Choose light wood or white-painted trim for an airy, minimalist style that feels fresh in any room.
- Eco-Friendly Reclaimed Wood: Salvage old boards for door trim in entryways or dens, reducing waste and adding one-of-a-kind character.
- Crown Molding Headers: Top your door frames with decorative crown molding for an upscale, finished appearance in dining or living areas.
- Paneled Surrounds: Frame doors with paneled trim for a traditional look that works beautifully in offices or libraries.
- Textured MDF Trim: Use pre-embossed MDF boards for easy installation and extra visual interest on bathroom or closet doors.
- Slim-Line Modern: Create subtle dimension with ultra-narrow trim that frames doors in tight spaces, like small bedrooms or pantries.
- Rustic Barnwood Borders: Highlight your entry with barnwood trim and pair with vintage hardware for a farmhouse-inspired update.
- Peel-and-Stick Trim: Try adhesive MDF strips for a fast, renter-friendly makeover—ideal for apartments or temporary updates.
- Layered Molding: Combine base, cap, and shoe moldings for dramatic depth and an elegant touch in formal rooms.
- Transom Trim: Frame both the door and transom window above with matching trim for a cohesive, custom look in foyers.
These ideas make it easy to refresh your home using diy door trim, offering creative ways to express your style, make eco-conscious choices, and add value to every room.
Step-by-Step Guide: How to Install DIY Door Trim Like a Pro
Installing new trim can instantly elevate any doorway, and with the right steps, even beginners can achieve flawless results. Taking on a diy door trim project not only saves money and gives you complete control over your home’s design, but also allows you to make sustainable choices by selecting eco-friendly materials and reducing renovation waste. Here’s a detailed, easy-to-follow process to help you install beautiful trim with confidence.
Step-by-Step Instructions
- Measure and Plan: Begin by measuring the height and width of your door frame, accounting for any unique corners or angles. Precise measurements ensure a snug, professional fit.
- Choose and Cut Materials: Select your preferred trim—MDF, pine, or reclaimed wood are excellent choices for both budget and sustainability. Use a miter saw to make clean, accurate 45° cuts for each corner.
- Pre-fit and Label Pieces: Before installation, dry-fit each piece of trim around your door to check the alignment and mark any necessary adjustments.
- Attach the Trim: Position the trim pieces and secure them to the wall using a nail gun or hammer with finishing nails. Start with the sides, then the top, always using a level to keep lines straight.
- Fill, Caulk, and Sand: Fill nail holes and joints with wood filler or caulk. This step not only gives a smooth appearance but also helps with insulation, reducing drafts for a more energy-efficient home.
- Finish with Paint or Stain: After the filler has dried, sand any rough spots and finish with a low-VOC paint or wood stain to complete your project in an environmentally responsible way.
- Final Inspection: Ensure all corners are tight, the trim is flush with the wall, and any excess caulk or paint is neatly cleaned up for a flawless, professional look.
By following these steps, your diy door trim installation will not only enhance the appearance of your space, but also contribute to responsible home improvement and long-lasting results.
Frequently Asked Questions & Pro Tips for DIY Door Trim Projects
Taking on a new home improvement project can bring up plenty of questions, especially when aiming for results that look professional and last for years. Whether you’re tackling your first diy door trim installation or looking to refine your skills, it helps to learn from expert tips and common experiences. Below are some of the most frequently asked questions, along with practical advice to help your next project go smoothly and responsibly.
FAQs & Pro Tips
- What’s the difference between door trim and casing?
Door trim is a decorative feature installed around a doorway, while casing refers to the structural molding that covers the gap between the door frame and wall. Both add style and function, but trim allows for greater customization and design flexibility. - Can I install new trim over existing door trim?
In many cases, yes. If the existing trim is flat and securely attached, you can layer new trim on top for added depth and style. Just be sure to measure carefully and use appropriate adhesives or nails. - How much does it cost to install diy door trim?
The cost varies depending on material choice—MDF and pine are the most budget-friendly, while solid hardwood or specialty moldings are pricier. Expect to spend $20–$50 per door on average, including tools and supplies. - Which paint or finish should I use for door trim?
Low-VOC, water-based paints and stains are best for both your health and the environment. Choose finishes that complement your existing decor, such as classic white for a timeless look or bold colors for a modern touch. - What if my walls are uneven or corners aren’t square?
Use caulk to fill minor gaps and a sanding block to adjust uneven edges. Flexible trim materials or shoe molding can help create a seamless fit, even in older homes. - How can I keep my trim looking new?
Clean door trim regularly with a damp cloth to remove dust and fingerprints. Touch up paint or stain as needed to maintain a fresh, polished appearance. - Where can I find more inspiration and support?
Browse platforms like Pinterest, Etsy, and Instagram for creative ideas, or visit trusted resources such as Home Depot, Lowe’s, and HGTV for step-by-step guides and video tutorials.
By staying informed and prepared, you can tackle diy door trim projects with confidence—improving your home’s look while making sustainable, responsible choices.
Conclusion
Upgrading with diy door trim is a simple way to refresh any room, add value, and express your personal style. With a variety of diy door trim ideas and easy installation steps, anyone can achieve a professional look without spending much. Choose sustainable materials for your next diy door trim project and enjoy a home update that’s stylish, budget-friendly, and uniquely yours.
")