Looking to straighten your teeth without spending thousands at the orthodontist? You’re not alone. In 2025, more people than ever are turning to DIY Invisalign kits as a convenient, budget-friendly alternative to traditional braces. These at-home clear aligner solutions promise professional-looking results—all from the comfort of your own home.
But with so many options flooding the market, how do you know which DIY Invisalign kit actually works? Which ones are safe, effective, and worth your money? In this comprehensive guide, we’ll compare the top 5 DIY Invisalign kits available today, helping you make a smart, confident choice based on real features, honest reviews, and expert insights.
If you’re ready to improve your smile without breaking the bank, keep reading. This article will walk you through everything you need to know about DIY Invisalign—from how it works to which kits truly deliver results in 2025.
What Are DIY Invisalign Kits and How Do They Work?
In today’s world of fast solutions and budget-friendly options, DIY Invisalign kits have become a popular choice for people looking to straighten their teeth without frequent dental visits or high orthodontic fees. These at-home aligner systems offer a convenient, affordable way to get a straighter smile using clear aligners delivered directly to your home. But how do DIY Invisalign kits actually work, and are they right for you?
Unlike professional Invisalign treatments that require in-office visits and ongoing monitoring from an orthodontist, DIY Invisalign alternatives are designed to be self-managed from start to finish. While some companies do provide remote support from licensed dentists, the majority of the process takes place at home—making it ideal for busy adults, teens, or anyone trying to cut dental costs.
Here’s how the typical DIY Invisalign process works, broken down into simple, easy-to-follow steps:
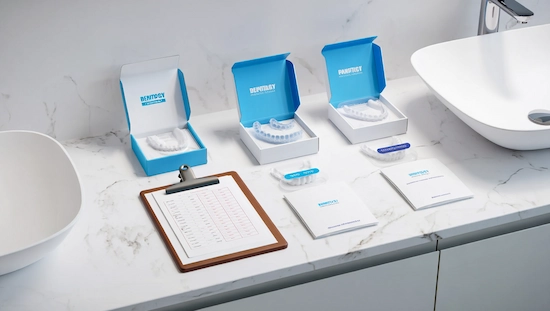
Step 1: Order a Starter Impression Kit
Most DIY Invisalign kits begin with a dental impression kit shipped to your door. You’ll follow detailed instructions to take molds of your teeth using putty and trays, or in some cases, a 3D scan if in-person locations are available.
Example: SmileDirectClub and NewSmile send you a complete impression kit with gloves, putty, and return packaging.
Step 2: Receive a Custom Treatment Plan
Once your impressions are returned, a team of dental professionals or software algorithms creates a personalized treatment plan. This includes digital 3D images that show how your teeth will move week by week.
Example: Byte provides a virtual preview showing how your smile will change over time.
Step 3: Get Your Full Set of Clear Aligners
After approving your treatment plan, you’ll receive a complete set of clear aligners. These aligners should be worn daily for 20–22 hours and replaced every 1–2 weeks as your teeth gradually shift.
Example: ALIGNERCO ships a full kit with labeled aligners and a guidebook to keep you on track.
Step 4: Monitor Progress (Optional Remote Support)
Some DIY Invisalign providers offer remote progress checks via an app, where you upload photos for orthodontist review. Others leave the monitoring up to you, relying on strict instructions and timelines.
Example: Candid offers full remote monitoring with licensed orthodontists throughout the treatment.
Step 5: Use Retainers to Maintain Results

Once your treatment is complete, most companies provide (or sell separately) clear retainers to prevent your teeth from shifting back. Wearing a retainer nightly is essential to keep your new smile in place.
Example: Byte and SmileDirectClub include a first set of retainers free with some packages.
Whether you’re looking for fast results, affordability, or expert guidance, DIY Invisalign kits offer a modern way to achieve straighter teeth—without ever stepping foot into a dental office. When used correctly, these kits can be highly effective for people with mild to moderate alignment issues.
Up next: we’ll explore the Top 5 DIY Invisalign Kits of 2025 and reveal which ones deliver the best value and results.
Top 5 DIY Invisalign Kits of 2025: In-Depth Comparison
With the rising demand for affordable teeth straightening, DIY Invisalign kits have become a go-to solution for people seeking straighter teeth at home. In 2025, the market is full of at-home clear aligner brands—each claiming to offer faster results, better support, and lower costs than traditional options. But not all DIY Invisalign kits are created equal.
In this section, we’ll take a closer look at the top 5 DIY Invisalign kits available in 2025. These kits have been selected based on key factors like treatment quality, price, customer reviews, professional support, and ease of use. Whether you’re searching for the fastest aligner system or the most budget-friendly option, this comparison will help you choose the right DIY Invisalign kit for your needs.
1. SmileDirectClub
SmileDirectClub is one of the most recognized names in the DIY Invisalign market. Their aligners are designed for mild to moderate alignment issues and are backed by remote support from licensed dentists. You can either take impressions at home or visit one of their SmileShops for a 3D scan.
- Price: ~$2,000
- Treatment Time: 4–6 months
- Highlights:
- Remote check-ins via app
- Starter kit with dental impression tools
- Free retainer included (limited time)
- Option for nighttime-only aligners
SmileDirectClub is best for those who want a balance of affordability and brand reputation in their DIY Invisalign experience.
2. Byte
Byte has made a name for itself with speed and technology. Their DIY Invisalign kit includes the HyperByte device, which uses gentle vibrations to reduce treatment time and discomfort. Byte also provides a satisfaction guarantee and lifetime smile warranty.
- Price: Starting at $1,999
- Treatment Time: 3–4 months (fastest on the market)
- Highlights:
- HyperByte device for faster results
- All-day and nighttime-only plans
- Doctor-monitored treatment plans
- First retainer set included
If you’re looking for DIY Invisalign kits with accelerated results, Byte may be the ideal choice.
3. Candid
Candid offers a hybrid model that combines DIY Invisalign convenience with full remote orthodontic supervision. It starts with an in-person 3D scan at a partner location, followed by remote monitoring from real orthodontists throughout the treatment.
- Price: Around $2,400
- Treatment Time: 6–8 months
- Highlights:
- Real orthodontist oversight
- Mobile app progress tracking
- Higher accuracy with 3D scans
- Premium treatment plans
Candid is perfect for those who want professional care without the cost or commitment of traditional braces.
4. ALIGNERCO
ALIGNERCO is known for offering the most affordable DIY Invisalign alternative on the market. Their kits are simple, beginner-friendly, and include everything needed to start treatment at home. However, ongoing professional monitoring is not included unless you upgrade your plan.
- Price: Starting at $1,145
- Treatment Time: 6–11 months
- Highlights:
- Lowest-cost aligner system
- Easy-to-use impression kit
- Payment plans as low as $95/month
- Retainers available for an extra fee
For budget-conscious users exploring DIY Invisalign options, ALIGNERCO provides great value.
5. NewSmile
NewSmile is a newer player in the DIY Invisalign kit industry, but it’s gaining attention for its excellent customer support and affordable prices. Their clear aligners are delivered with detailed instructions, and they offer both daytime and nighttime treatment options.
- Price: ~$1,295
- Treatment Time: 4–6 months
- Highlights:
- User-friendly kits and instructions
- Virtual previews of smile progress
- Retainer included
- Flexible treatment schedule
NewSmile is ideal for beginners who want a simple and supportive DIY Invisalign experience.
Each of these DIY Invisalign kits offers a different blend of features, pricing, and results. By comparing your personal needs—like budget, time commitment, and desire for professional oversight—you can confidently select the best at-home aligner solution to transform your smile in 2025.
How to Choose the Right At-Home Aligner Kit for You
With so many DIY Invisalign kits available in 2025, choosing the right one can feel overwhelming. While each kit promises straighter teeth, faster results, and budget savings, not all aligner systems offer the same level of quality, support, or effectiveness. Selecting the best option depends on your specific needs, dental goals, and lifestyle.
This section breaks down the most important factors to consider when selecting a DIY Invisalign kit. By understanding these criteria, you can make an informed decision and choose the aligner system that gives you the results you want—safely and affordably.
1. Know Your Dental Needs and Case Type
Not all DIY Invisalign kits are suited for every dental case. Most at-home aligner brands are designed for mild to moderate crowding, gaps, or misalignment.
Best for mild corrections: ALIGNERCO, NewSmile
Not suitable for: severe overbites, jaw issues, or rotated teeth
If your case is complex, consult with an orthodontist before using any DIY Invisalign kit.
2. Consider Professional Oversight and Monitoring
Some DIY Invisalign brands, like Candid and Byte, offer remote monitoring from licensed orthodontists, while others rely on you to follow the treatment plan independently.
🧠 Choose monitored kits if you want expert guidance throughout treatment.
🛠️ Choose unmonitored kits if you’re confident managing your own progress.
Monitored options: Candid, Byte
Less monitored but affordable: SmileDirectClub, ALIGNERCO
3. Evaluate Price and Payment Options
Cost is a major factor when choosing a DIY Invisalign solution. Prices can range from just over $1,000 to nearly $2,500 depending on the brand, monitoring, and included extras like retainers or whitening.
Lowest cost: ALIGNERCO (~$1,145)
Best payment plans: NewSmile ($84/mo), Byte ($70/mo)
Don’t forget to check whether retainers are included or sold separately.
4. Treatment Time and Flexibility
Are you looking for fast results or a flexible schedule that fits your routine? Some DIY Invisalign kits offer nighttime-only aligners that you can wear while sleeping, though they may take longer.
Fastest results: Byte (3–4 months)
Nighttime aligners: Byte, SmileDirectClub, NewSmile
Choose based on how quickly you want results and how committed you are to wearing aligners for 20+ hours a day.
5. Customer Support and Ease of Use
Reading real user reviews can help you gauge how easy the process is and whether the company offers responsive support. DIY Invisalign kits should come with clear instructions and reliable customer service if any issues arise.
Best for beginners: NewSmile (user-friendly instructions) Strong customer support: Byte, Candid
Quick Checklist to Choose the Right DIY Invisalign Kit:
- Is your dental case mild or complex?
- Do you want orthodontist supervision?
- What’s your total budget?
- How fast do you want results?
- Do you prefer daytime or nighttime aligners?
- Is customer service important to you?
By taking time to compare these factors, you’ll be able to confidently choose the DIY Invisalign kit that aligns with your goals, comfort level, and budget. Remember, the right choice isn’t always the cheapest—it’s the one that delivers safe, long-lasting results.
Are DIY Invisalign Kits Safe and Effective?
As DIY Invisalign kits gain popularity, one of the most important questions people ask is: Are they really safe? And even more crucial: Do they actually work? These are valid concerns, especially when you’re trusting your smile to a treatment done entirely from home.
The truth is, DIY Invisalign kits can be both safe and effective—but only when used correctly and under the right conditions. While they offer convenience and affordability, it’s essential to understand the limitations and risks associated with at-home clear aligner treatment. Let’s take a closer look at the key factors that affect safety and results.
1. Safety Depends on Case Severity
DIY Invisalign kits are best suited for people with mild to moderate dental issues like small gaps, minor crowding, or slightly crooked teeth. They are not recommended for more complex problems such as severe overbites, underbites, jaw misalignment, or rotated teeth.
Safe for:
- Mild crowding
- Small spacing
- Cosmetic adjustments
Risky for:
- Jaw alignment issues
- Deep bite or crossbite
- Teeth requiring extraction or major movement
Always take the brand’s eligibility quiz or consult with a dental professional to confirm whether you’re a candidate for DIY Invisalign treatment.
2. The Role of Professional Monitoring
One of the biggest safety concerns with DIY Invisalign kits is the lack of direct supervision by an orthodontist. Some kits include remote monitoring through mobile apps or photo submissions, while others do not.
Brands offering orthodontist oversight:
- Candid (full remote monitoring by licensed orthodontists)
- Byte (remote check-ins and treatment support)
Less supervision:
- ALIGNERCO
- NewSmile
If your case needs expert oversight, choose a kit that offers remote monitoring. This reduces the risk of improper tooth movement and long-term damage.
3. Effectiveness Depends on Consistent Wear
Like professional clear aligners, DIY Invisalign kits require strict compliance. Aligners must be worn 20 to 22 hours a day and changed on schedule to be effective.
Common reasons for poor results:
- Not wearing aligners long enough each day
- Skipping weeks or delaying transitions
- Not using retainers after finishing treatment
When used as directed, most users see results within 4–6 months. However, skipping aligner wear—even for a day or two—can delay or reverse progress.
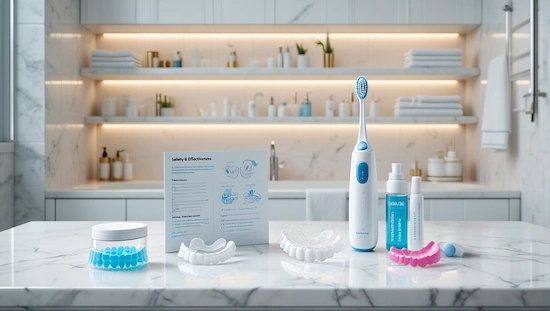
4. Support and Resources Matter
The effectiveness of a DIY Invisalign treatment also depends on how well the company supports its users. Look for brands that offer:
- Detailed instructions
- Customer support via chat or phone
- Access to licensed dental professionals
- Retainer plans for post-treatment maintenance
Top-rated for support: Byte, SmileDirectClub
Retainers included: Byte, NewSmile (check specific offers)
5. What Dentists and Orthodontists Say
Many dental professionals warn against unsupervised at-home treatment, especially for patients with more than cosmetic concerns. However, they also acknowledge that DIY Invisalign kits can be effective for the right candidates when paired with remote guidance and proper usage.
According to the American Dental Association (ADA), unsupervised use of aligners may lead to:
- Improper tooth movement
- Gum irritation
- Bite misalignment
- Long-term complications if not corrected early
That’s why it’s critical to follow all guidelines, choose a reputable brand, and seek professional help if anything feels off.
Final Thoughts on Safety and Effectiveness
DIY Invisalign kits have transformed the orthodontic space by making teeth straightening more accessible than ever. When used by suitable candidates, with proper commitment and brand support, these kits can safely deliver excellent results. The key is to choose wisely, follow your treatment plan closely, and don’t hesitate to contact a dental professional if needed.
Final Verdict: Which DIY Invisalign Kit Works Best in 2025?
Now that we’ve broken down the top options, you’re probably wondering: Which DIY Invisalign kit is truly the best in 2025? The answer depends on what matters most to you—speed, cost, professional support, or ease of use. Each brand has its strengths, and the “best” kit can vary based on your dental needs and lifestyle.
To help you decide, we’ve summarized the top 5 DIY Invisalign kits using clear criteria: treatment speed, supervision level, price, and customer satisfaction. Whether you’re a budget-conscious shopper or someone looking for orthodontist-backed results, this verdict will guide you toward the right choice.
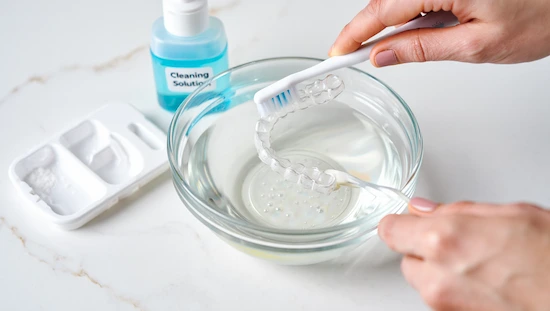
As you start your journey with a DIY Invisalign kit, it’s important to keep your aligners clean for the best results. Using a reliable diy invisalign cleaner not only helps maintain your aligners’ clarity and comfort but also protects your oral health throughout treatment. For the best care tips and a simple guide to making your own diy invisalign cleaner, check out our full article on how to keep your aligners spotless at home.
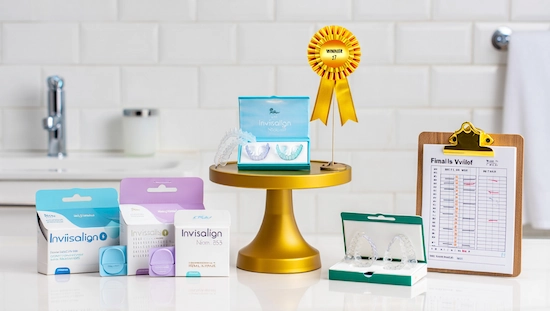
Best Overall DIY Invisalign Kit: Byte
Byte remains the front-runner for 2025. With its HyperByte technology, fast treatment times, and strong customer support, Byte is ideal for those seeking quick, efficient, and dentist-backed results.
- Why It Wins:
- Fastest results (3–4 months)
- Optional nighttime-only aligners
- Orthodontist-designed treatment plans
- Lifetime smile guarantee
Byte is best for people who want speed and assurance that their DIY Invisalign journey is monitored by professionals.
Most Affordable Kit: ALIGNERCO
If price is your top concern, ALIGNERCO offers the most budget-friendly solution. It’s great for mild corrections and comes with flexible payment plans to make straightening your teeth more accessible.
- Why It Wins:
- Starting at $1,145
- Simple impression process
- Multiple financing options
- Great for mild alignment issues
ALIGNERCO is perfect for users who want a low-cost DIY Invisalign alternative without frills.
Best Remote Supervision: Candid
For those who want peace of mind through full orthodontist supervision, Candid is the best option. It bridges the gap between in-office care and at-home convenience.
- Why It Wins:
- Licensed orthodontist oversight from start to finish
- 3D scan accuracy (required in-person or via partner location)
- App-based check-ins
- Higher accuracy for more complex cases
Candid is best for anyone who prefers close, professional monitoring while using a DIY Invisalign kit.
Best for First-Time Users: NewSmile
If this is your first experience with at-home aligners, NewSmile offers a smooth, beginner-friendly process. Their instructions are clear, and the setup is simple.
- Why It Wins:
- Straightforward impression kit
- Retainer included
- Both daytime and nighttime aligners available
- Great reviews on ease of use
NewSmile is ideal for newcomers to the DIY Invisalign world who want simplicity without sacrificing quality.
Most Well-Known Brand: SmileDirectClub
As the most widely recognized name in the DIY Invisalign space, SmileDirectClub has helped over a million customers. Their wide reach and hybrid in-person/remote model make them a convenient option for many.
- Why It Wins:
- Established reputation
- Optional in-person 3D scans at SmileShops
- Flexible aligner plans (daytime or nighttime)
- Free first retainer (limited-time offer)
SmileDirectClub is best for users who value brand trust and hybrid convenience.
Final Tip Before You Choose
While every DIY Invisalign kit mentioned above is legitimate and effective when used correctly, your decision should come down to:
- Your dental case complexity
- Desired treatment speed
- Budget flexibility
- Need for professional support
Take the time to review each option’s features, read real customer reviews, and don’t hesitate to contact their support teams with questions before committing.
Conclusion
Straightening your teeth no longer requires months of dental visits or a massive investment. Thanks to the rise of DIY Invisalign kits, more people can now achieve a confident, straighter smile from the comfort of home. Whether you’re prioritizing cost, speed, or professional support, there’s a DIY Invisalign solution in 2025 that fits your needs.
From the high-tech precision of Byte to the budget-friendly value of ALIGNERCO, each kit we’ve explored offers a unique set of benefits. The key to success lies in choosing the right kit for your dental goals—and following the treatment plan exactly as directed. When used correctly, DIY Invisalign kits can deliver real, lasting results for mild to moderate alignment issues.
Before making your decision, consider your case complexity, treatment preferences, and how much support you want from dental professionals. A little research now can save you money, time, and frustration later.
Are you ready to start your smile journey? Explore the best DIY Invisalign kits of 2025 and take the first step toward the smile you deserve—no office visits required.
FAQs: DIY Invisalign Kits
Q: Are DIY Invisalign kits safe to use at home?
A: Yes, DIY Invisalign kits can be safe for mild to moderate alignment issues when used as directed. However, they are not suitable for complex dental problems without professional supervision.
Q: Which DIY Invisalign kit is the most affordable in 2025?
A: ALIGNERCO is the most budget-friendly option, starting at just $1,145. It offers a complete treatment kit and flexible payment plans.
Q: Can DIY Invisalign kits actually straighten teeth effectively?
A: Yes, when worn consistently and following the treatment plan, DIY Invisalign kits can deliver noticeable results in 4–6 months for eligible cases.
Q: What’s the fastest DIY Invisalign kit available?
A: Byte is the fastest option, with treatment times as short as 3–4 months thanks to its HyperByte technology.
Q: Do I need to wear retainers after using a DIY Invisalign kit?
A: Absolutely. Retainers are essential to maintain your results and prevent teeth from shifting back after treatment.
")