
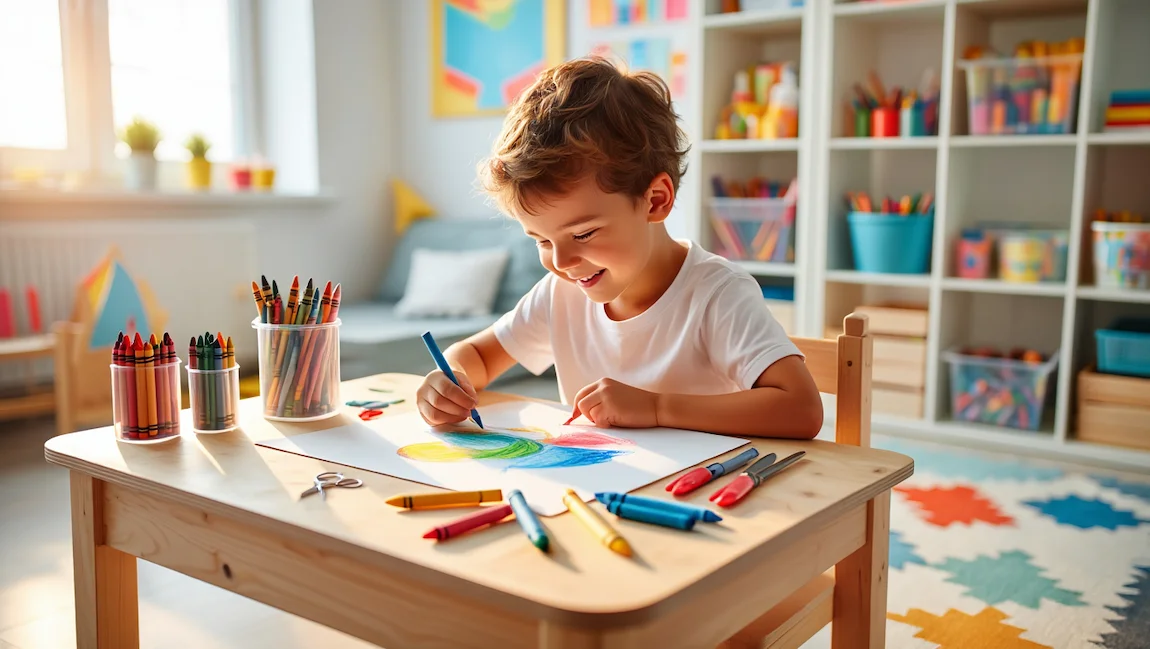
A DIY kid craft desk is the perfect way to create a dedicated space where your child can explore their creativity, stay organized, and enjoy hands-on activities. Whether your little one loves painting, drawing, or making fun DIY projects, having a custom craft desk encourages learning and independence.
Store-bought craft desks can be expensive, and they might not always fit your space or your child’s needs. That’s why building a DIY kid-friendly desk is a budget-friendly and customizable solution. With a few simple materials and tools, you can create a functional, stylish, and space-saving craft desk tailored to your child’s interests.
In this guide, we’ll walk you through how to build a DIY kid craft desk step by step, including materials, tools, creative design ideas, and organization tips. Whether you’re working with a small space or want extra storage, we’ve got you covered! Let’s get started on crafting the perfect workspace for your little artist.
Why Your Child Needs a DIY Craft Desk
A DIY kid craft desk is more than just a workspace—it’s a dedicated area that fosters creativity, learning, and independence. Whether your child enjoys drawing, painting, or crafting, having a personal desk designed specifically for them can make a big difference. Here’s why every child should have a DIY craft desk at home:
1. Encourages Creativity and Independent Learning
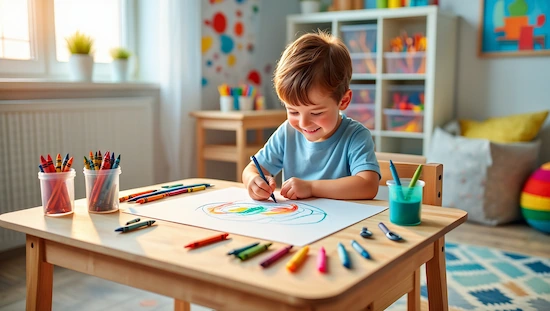
Children thrive in environments where they can explore their imagination freely. Having a diy kid craft desk gives kids a special place to experiment with colors, textures, and materials, all while keeping messes off the dining table or floor. A diy kid craft desk setup encourages independent learning, problem-solving, and self-expression through art and hands-on activities. By providing a diy kid craft desk, you create the perfect space for your child to unleash their creativity and enjoy hours of artistic fun.
2. Helps Keep Craft Supplies Organized
If you’ve ever struggled with scattered crayons, papers, and glue sticks all over your home, a DIY kid craft desk with storage can be a game-changer. By incorporating built-in storage bins, drawers, or shelves, you can keep art supplies neatly organized and easily accessible. This not only reduces clutter but also teaches children responsibility in keeping their workspace tidy.
3. Provides a Comfortable and Ergonomic Workspace
Unlike using a random table or the floor for crafting, a diy kid craft desk ensures your child has the right posture and comfort while working on their projects. Selecting an adjustable or appropriately sized diy kid craft desk and chair can help prevent discomfort and strain, making craft time much more enjoyable. Plus, pairing the diy kid craft desk with a child-friendly ergonomic chair supports their back and can even improve concentration during creative activities.
4. Saves Money with a Budget-Friendly, Customizable Solution
Store-bought craft desks can be expensive and may not always meet your child’s specific needs. By building your own DIY kid craft desk, you can customize the size, style, and features while saving money. Whether you want a small desk for a compact space or one with extra storage, DIY projects allow you to create the perfect desk on a budget using affordable materials like plywood or MDF board.
5. Creates a Dedicated Learning & Activity Space
A craft desk isn’t just for arts and crafts—it can also serve as a multipurpose learning station. Whether your child needs a space for reading, writing, doing homework, or playing educational games, having their own desk fosters a sense of ownership and focus. It helps them develop healthy study habits from a young age and separates play areas from learning spaces.
Materials and Tools Needed for a DIY Kid Craft Desk
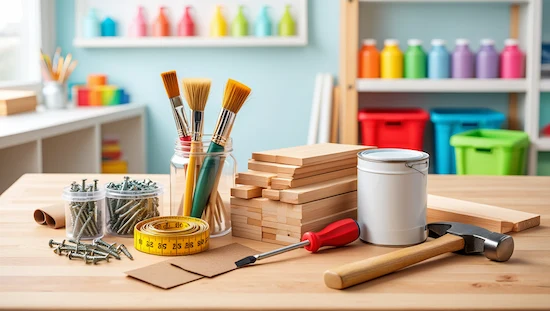
Before starting your DIY kid craft desk project, it’s essential to gather the right materials and tools to ensure a smooth and successful build. Choosing high-quality, child-safe materials will make the desk durable, functional, and safe for your little one. Here’s everything you need to create a sturdy, budget-friendly craft desk that fits your child’s needs.
1. Essential Materials for Building a DIY Kid Craft Desk
The choice of materials will depend on your budget, design preferences, and available space. Here are some commonly used materials:
Wood or Desk Surface Options:
- Plywood: A lightweight, affordable, and easy-to-cut option, perfect for beginners.
- MDF (Medium-Density Fiberboard): A smooth, budget-friendly alternative to solid wood that’s great for painting.
- Recycled or Upcycled Wood: Eco-friendly and cost-effective, using repurposed wood adds a rustic or vintage look.
- Pre-made Tabletops: If you want a quick solution, you can purchase a ready-made tabletop and customize the legs and storage.
Support and Structure Materials:
- Wooden legs or metal brackets: Provides sturdy support for the desk. You can use wooden table legs, repurposed furniture legs, or adjustable-height legs.
- L-brackets or corner braces: Helps reinforce the desk for stability.
- Screws and nails: Required to assemble the desk securely. Choose rust-resistant screws for long-lasting durability.
- Wood glue: Adds extra strength to joints and keeps the desk sturdy.
Paint, Finishes, and Protective Coating:
- Non-toxic, child-safe paint: Choose VOC-free (volatile organic compound-free) paint to ensure safety.
- Wood stain or sealant: Protects the desk from spills, scratches, and wear over time.
- Chalkboard or dry-erase paint: A fun addition for kids who love to draw directly on their desk surface.
2. Additional Storage and Organization Materials
A well-organized craft desk with storage helps keep supplies tidy and easily accessible. Here are some materials to add storage:
- Pegboards & Hooks: Mount a pegboard above the desk to hang scissors, paintbrushes, and crafting tools.
- Storage Bins & Baskets: Use small bins to sort crayons, markers, glue sticks, and paper.
- Floating Shelves: Ideal for storing books, craft supplies, and decorative items.
- Built-in Drawers: If you want a more polished look, install sliding drawers for better organization.
- Magnetic Strip or Cup Holders: Great for holding metal crafting tools or cups filled with pencils and brushes.
3. Essential Tools for Assembling the DIY Kid Craft Desk
Having the right tools will make your DIY project faster, safer, and more efficient. Most of these are beginner-friendly and commonly available in hardware stores:
Cutting and Measuring Tools:
- Measuring tape & ruler: Ensures precise cuts and correct desk dimensions.
- Pencil & chalk: For marking cut lines and screw placements.
- Hand saw or circular saw: Needed to cut wood to the right size (a jigsaw can also be helpful for rounded edges).
Assembly and Fastening Tools:
- Electric drill & screwdriver: Makes screwing and assembling much quicker and easier.
- Sandpaper or electric sander: Smooths rough edges to make the desk safe for children.
- Clamps: Holds pieces of wood together while assembling for extra stability.
Finishing and Decoration Tools:
- Paintbrushes or foam rollers: For applying paint or wood stain evenly.
- Wood filler or putty: Covers small holes or imperfections before painting.
- Painter’s tape: Helps achieve clean, crisp paint lines for a professional finish.
4. Choosing the Right Size and Design for Your DIY Kid Craft Desk
Before you start cutting and assembling, consider the ideal size based on your child’s height, available space, and future growth. Here are some general guidelines:
- For toddlers (ages 3-5): Desk height should be 18-20 inches
- For younger kids (ages 6-9): Desk height should be 20-24 inches
- For older kids (ages 10-12): Desk height should be 24-30 inches
To make your DIY kids’ desk adjustable, consider using adjustable legs or a design that can be modified as your child grows.
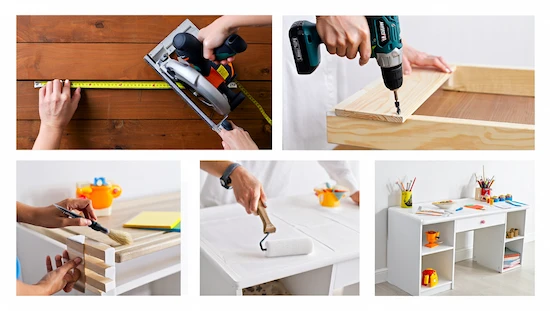
Step-by-Step Guide to Building a DIY Kid Craft Desk

Now that you have all the materials and tools ready, it’s time to start building your DIY kid craft desk. This step-by-step guide will walk you through the process of assembling a sturdy, functional, and child-friendly craft desk. Whether you’re making a simple desk with a tabletop and legs or a storage-friendly craft station, follow these steps to create the perfect DIY workspace for your child.
1. Plan and Design Your DIY Kid Craft Desk
Before cutting materials, it’s essential to decide on the desk size, shape, and features. Here’s how to plan your desk:
- Measure the space where you’ll place the desk to ensure it fits properly.
- Determine the desk height based on your child’s age:
- Toddlers (3-5 years): 18-20 inches high
- Younger kids (6-9 years): 20-24 inches high
- Older kids (10-12 years): 24-30 inches high
- Decide on storage options, such as shelves, drawers, or pegboards for organizing craft supplies.
- Sketch a simple design or find inspiration from DIY craft desk ideas online.
Tip: If you’re short on space, consider a foldable wall-mounted desk or a corner desk design.
2. Cut and Prepare the Materials
Once you have your design ready, it’s time to cut the materials to size and prepare them for assembly.
Cutting the Desk Surface & Supports
- Use plywood, MDF, or a repurposed tabletop for the desk surface.
- Mark and cut the tabletop to the desired size using a circular saw or hand saw.
- If adding shelves or drawers, cut additional wood panels accordingly.
Sanding the Edges
- Use sandpaper (120-220 grit) or an electric sander to smooth rough edges.
- Pay extra attention to corners to prevent sharp edges that could be unsafe for kids.
Tip: If you want a unique touch, you can round the edges for a softer, more polished look.
3. Assemble the Desk Frame and Legs
Now that your materials are ready, start assembling the desk frame and legs.
Attaching the Legs
- Choose between wooden table legs, adjustable metal legs, or a simple A-frame design.
- Attach the legs securely using screws and L-brackets to ensure stability.
- If using hairpin or metal legs, attach them to the four corners of the desk using a drill and screws.
Reinforcing the Desk Structure
- Add support beams or cross braces if needed to prevent wobbling.
- If installing drawers or cubbies, attach side panels securely before placing the desk surface.
Tip: If you want an adjustable-height desk, consider using adjustable legs or a DIY method with removable leg sections.
4. Add Storage and Organization Features
To keep your child’s craft supplies organized, consider adding storage options:
Built-in Storage Ideas:
- Attach floating shelves above the desk for extra storage.
- Install a pegboard to hang scissors, rulers, and art supplies.
- Add drawers or cubbies under the desk for easy access to craft materials.
- Use small baskets or plastic bins for organizing crayons, markers, and glue sticks.
Tip: If you want a dual-purpose desk, consider adding a flip-up tabletop with hidden storage underneath.
5. Paint, Decorate, and Personalize the Desk
Once the desk is assembled, it’s time for the fun part—customizing it!
Painting and Finishing Touches
- Apply child-safe, non-toxic paint in a fun color that matches your child’s room.
- Use chalkboard paint on part of the desk surface for a fun drawing area.
- Add a clear wood sealant or varnish to protect against spills and scratches.
Personalization Ideas
- Add your child’s name or initials to the desk using vinyl letters or stencils.
- Stick removable wall decals for a fun, colorful theme.
- Attach a cup holder or storage rail on the side for holding brushes, pencils, or paint bottles.
Tip: Consider adding a soft desk mat or a cushion on the chair for extra comfort!
Creative and Space-Saving DIY Kid Craft Desk Ideas

Not everyone has a dedicated playroom or large space for a kid’s craft desk, but that doesn’t mean your child can’t have a creative workspace. Whether you’re working with a small apartment, a shared bedroom, or a multi-purpose area, there are plenty of space-saving and innovative DIY desk ideas to consider.
Below are some clever, functional, and budget-friendly diy kid craft desk designs that maximize space while keeping diy kid craft desk supplies organized and easily accessible. Each diy kid craft desk idea is perfect for any home, offering solutions that help your child enjoy creative time at their own diy kid craft desk.
1. Wall-Mounted Foldable Craft Desk – Ideal for Small Spaces
A wall-mounted, foldable desk is a great solution for compact spaces. It provides a work surface when needed and folds up neatly when not in use.
How It Works:
- The desk folds down from the wall like a Murphy bed, creating a flat workspace.
- When folded up, it can double as a chalkboard, whiteboard, or a decorative storage unit.
- You can add small shelves inside to hold craft supplies.
Why It’s Great:
✔️ Saves floor space.
✔️ Easy to build using simple hinges and brackets.
✔️ Can be painted or customized to match any decor.
Tip: Add a pegboard inside the foldable section for organized storage of scissors, glue, and markers.
2. Corner DIY Kid Craft Desk – Maximizing Unused Space
A corner desk makes use of otherwise wasted space and provides a cozy creative nook for kids.
How to Build It:
- Install a triangular or L-shaped wooden tabletop in a corner.
- Add floating shelves above to hold supplies.
- Use rolling storage bins underneath for extra organization.
Why It’s Great:
✔️ Makes use of awkward or small spaces.
✔️ Keeps craft clutter confined to one area.
✔️ Great for siblings or multiple kids—each gets their own corner!
Tip: If space allows, use a wrap-around design for extra room to store craft tools and supplies.
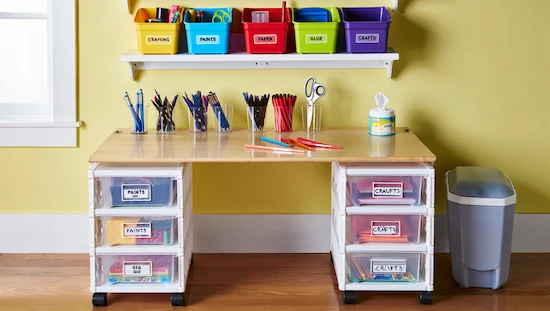
3. Storage-Friendly Desk with Built-In Cubbies or Drawers
If organization is a priority, consider a DIY desk with built-in storage to keep craft materials neat and tidy.
How to Build It:
- Use a small bookshelf or cube organizer as desk legs for built-in storage.
- Add drawer dividers or bins to separate different craft supplies.
- Label compartments for easy access to glue, markers, paper, and scissors.
Why It’s Great:
✔️ Keeps craft supplies organized and within reach.
✔️ Dual-purpose design—storage and workspace in one!
✔️ Customizable with paint, decals, or fun designs.
Tip: Use transparent storage bins so kids can easily find what they need without making a mess.
4. DIY Loft Bed with a Craft Desk Underneath – Perfect for Shared Bedrooms
If your child’s room is small or shared with a sibling, consider a loft bed with a built-in desk underneath.
How It Works:
- The bed is elevated, and the space underneath becomes a functional workspace.
- You can add shelves, drawers, or a pegboard for craft storage.
- Perfect for combining sleep and creativity in one compact area.
Why It’s Great:
✔️ Uses vertical space efficiently.
✔️ Great for small bedrooms or shared rooms.
✔️ Provides a quiet, dedicated workspace for crafting and homework.
Tip: Attach LED lights or a clip-on lamp underneath the loft for better lighting!
5. Rolling Craft Desk – Portable and Versatile
A rolling desk is a fantastic option if you need a movable workspace that can be tucked away when not in use.
How to Build It:
- Attach caster wheels to the bottom of a small desk or repurposed table.
- Use a narrow desk design so it can be slid against a wall when not in use.
- Add baskets or rolling carts underneath for easy storage.
Why It’s Great:
✔️ Can be moved around as needed.
✔️ Works well for multi-purpose rooms.
✔️ Perfect for families who want a temporary craft station.
Tip: Use a drop-leaf design to expand the workspace when needed and fold it back when done!
6. Dual-Purpose DIY Craft Desk & Activity Table
If you want a versatile, multi-functional desk, consider a design that doubles as a play table or homework station.
How It Works:
- Build a basic wooden desk with a removable or adjustable tabletop.
- One side can be used for crafting, while the other can be used for homework or reading.
- Add a roll of craft paper on one side for drawing and painting.
Why It’s Great:
✔️ Saves space by combining two functions in one.
✔️ Keeps kids entertained with multiple activity options.
✔️ Can grow with your child—perfect for crafts now, homework later!
Tip: If your child loves LEGO, consider adding a LEGO-compatible tabletop on one side!
Tips for Organizing and Maintaining Your Kid’s Craft Desk
Once your diy kid craft desk is complete, the next step is ensuring that your diy kid craft desk stays organized and easy to maintain. Keeping the diy kid craft desk workspace tidy not only helps maximize creativity but also ensures that your child can easily access their craft supplies without making a mess. Here are some effective, practical tips to help you keep your child’s diy kid craft desk neat, organized, and ready for creativity at any time.
1. Use Clear Storage Bins and Labels
One of the most effective ways to keep craft supplies organized is by using clear storage bins and labels. This ensures that your child can easily identify what’s inside each container and keeps items in their place.
How to Do It:
- Use clear plastic bins, jars, or baskets for crayons, markers, scissors, glue, and other small supplies.
- Label each bin with a picture or word to make it easier for younger kids to find and return items.
- For large items, like paper rolls or fabric, use clear boxes or baskets to keep them contained and accessible.
Why It’s Great:
✔️ Visual organization helps kids find what they need quickly.
✔️ Clear bins prevent unnecessary digging and mess-making.
✔️ Labels encourage kids to participate in organizing their craft space.
Tip: Use color-coded bins to group similar items together, like one bin for all drawing supplies and another for gluing materials. This will help teach your child organization and make cleanup easier!
2. Create a System for Easy Cleanup
A clean desk encourages more creativity and reduces frustration when it’s time to work on a new project. Establishing a cleanup routine will help your child develop good organizational habits while maintaining a clean workspace.
How to Do It:
- Establish a designated cleanup time at the end of each craft session.
- Use a garbage bin or small waste bag for scrap paper, wrappers, and other trash.
- Store cleaning supplies nearby, like wet wipes or a small cleaning cloth, to quickly wipe down surfaces.
- Teach your child to return each item to its proper place as they finish using it.
Why It’s Great:
✔️ Regular cleanup helps avoid clutter from piling up.
✔️ Establishes a routine that your child can easily follow.
✔️ Encourages a sense of responsibility and helps develop organizational skills.
Tip: Create a checklist of tasks for cleaning up (e.g., “put markers in the bin,” “throw away scraps”) to make it a fun, simple process your child can follow independently.
3. Make Use of Vertical Storage
When space is limited, vertical storage is your best friend. Utilizing the walls or even the back of the desk can keep the workspace clear while providing plenty of storage for tools, supplies, and artwork.
How to Do It:
- Install a pegboard on the wall above or beside the desk to store items like scissors, brushes, and other small supplies.
- Use wall-mounted shelves to store larger bins, books, or crafting tools out of reach but still easily accessible.
- Consider a hanging organizer or over-the-door storage for extra paper, stickers, and miscellaneous items.
Why It’s Great:
✔️ Keeps the desk surface clear for crafting.
✔️ Maximizes wall space and makes items easier to access.
✔️ Helps store larger supplies that don’t fit on the desk.
Tip: If your child’s desk is near a window or wall, install floating shelves above the desk to hold more materials. Adding a chalkboard or whiteboard can also keep a running list of the supplies needed for projects.
4. Invest in Functional Craft Tools and Supplies
Instead of filling the desk with random craft supplies, consider investing in functional and versatile tools that make crafting easier and more enjoyable for your child. This will help you maintain an organized space while offering everything your child needs to be creative.
How to Do It:
- Purchase multi-use supplies like washable markers, non-toxic glue, and coloring books that can be used for multiple crafts.
- Store items like stamps, stencils, and templates in a compact storage case with individual compartments.
- Keep a rotating set of supplies available so that you’re not overwhelmed with too many materials at once.
Why It’s Great:
✔️ Reduces clutter by keeping only what’s necessary and multi-purpose.
✔️ Keeps kids from being overstimulated by having too many options.
✔️ Helps maintain a clean, organized workspace.
Tip: Rotate supplies every few months to keep things fresh and encourage creativity with new materials.
5. Create a Special Space for Finished Projects
A place to store your child’s finished artwork and projects is just as important as keeping their supplies organized. This helps them celebrate their creations and keeps their workspace clutter-free.
How to Do It:
- Use a storage box or portfolio to keep finished drawings, paintings, and projects in good condition.
- Install art display rails or a gallery wall where your child can hang and show off their creations.
- If possible, frame or laminate some of their favorite works to create a rotating art collection.
Why It’s Great:
✔️ Keeps finished artwork organized and prevents clutter.
✔️ Provides a sense of accomplishment for your child.
✔️ Helps you preserve memories of their creative growth.
Tip: Create a “wall of fame” where kids can pick their favorite projects to display. It can become an interactive area where they decide what to showcase.
6. Regularly Declutter the Craft Desk
Crafting supplies accumulate over time, and it’s easy for the desk to become cluttered with unused or broken items. Decluttering the workspace at least once every month helps keep the space organized and functional.
How to Do It:
- Sort through supplies and throw away or donate unused or broken items.
- Reorganize storage bins to ensure that everything has a designated space.
- Encourage your child to participate in the decluttering process to teach responsibility and organization.
Why It’s Great:
✔️ Prevents the accumulation of useless supplies that take up space.
✔️ Encourages kids to be mindful of their possessions.
✔️ Keeps the desk functional and fresh for new projects.
Tip: Use this decluttering time to swap out old supplies and refresh the desk with new materials or tools that spark interest!
Final Thoughts on Building a DIY Kid Craft Desk
A diy kid craft desk is more than just a piece of furniture—it’s a creative space where your child can explore, learn, and bring their artistic ideas to life. By designing a personalized and functional diy kid craft desk, you provide a dedicated area that encourages hands-on activities, reduces clutter around the diy kid craft desk, and fosters independence every time your child sits down at their diy kid craft desk.
With the right materials, a thoughtful layout, and smart organization, you can build a DIY kid craft desk that fits your child’s needs while making the most of your available space. Whether you go for a simple design or a more elaborate setup with storage and custom features, this project is a great way to combine practicality with creativity.
Start building your DIY kid craft desk today and watch your child’s imagination flourish in their very own crafting space!
")
13 thoughts on “The Best DIY Kid Craft Desk – 5 Simple Steps (Budget-Friendly Guide)”
Comments are closed.