
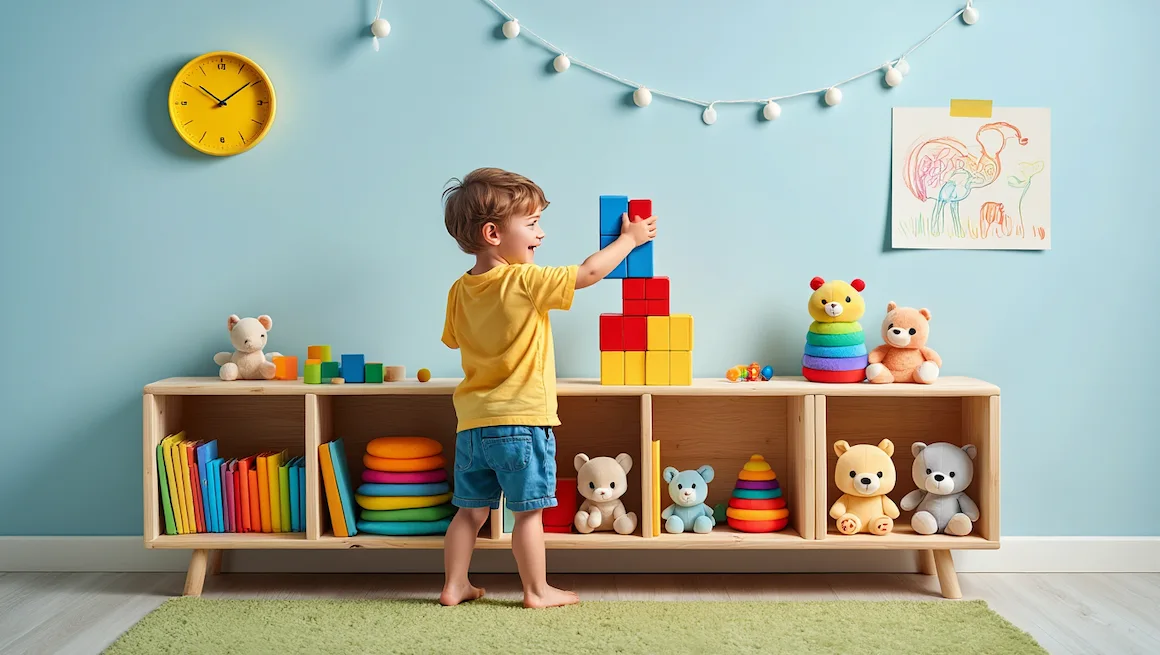
Is your child’s room overrun with toys, books, and art supplies? Keeping a kid’s space organized can feel like an endless battle, but it doesn’t have to be! With a little creativity and some DIY magic, you can create a DIY kids storage shelf that’s both functional and adorable. These storage solutions will not only help you organize but also bring joy to your child’s space. A DIY kids storage shelf is the perfect way to combine practicality with creativity, making it a project both you and your child will love.
In this post, we’ll explore 10 Adorable DIY Kids Storage Shelf Ideas to Organize Your Child’s Space. These projects are not only practical but also budget-friendly and customizable to fit any room’s style.
Whether you’re a seasoned DIY enthusiast or a beginner looking for simple ideas, these DIY kids storage shelf projects will help you transform clutter into a clean, organized, and fun space for your little one. With a DIY kids storage shelf, you can create a practical and playful solution that fits perfectly into your child’s room. Let’s dive in and get inspired!
Simple Wooden Crate Shelves

Wooden crates are a versatile and affordable material for creating DIY kids storage shelves. They’re easy to find, simple to work with, and can be customized to fit any room’s decor. With a DIY kids storage shelf, you can transform basic crates into functional and stylish storage solutions for your child’s space. Here are four creative ways to turn wooden crates into a DIY kids storage shelf that’s both practical and fun!
Idea 1: Stacked Wooden Crates for Toy Storage
- How to Do It: Stack wooden crates horizontally or vertically to create a shelving unit. Secure them with screws or brackets for stability.
- Customization: Paint the crates in bright colors or use stencils to add fun patterns like stars, animals, or geometric shapes.
- Why It Works: This idea is perfect for storing larger toys, stuffed animals, or bins of LEGO bricks. The open design makes it easy for kids to access their toys and put them away.
Idea 2: Painted Crates with Labels for Books and Toys
- How to Do It: Paint the crates in a cohesive color scheme (e.g., pastels for a calming look or bold colors for a playful vibe). Add labels to each crate for easy organization.
- Customization: Use chalkboard paint on the front of the crates so you can change the labels as your child’s storage needs evolve.
- Why It Works: Labeled crates help teach kids about organization and make cleanup time a breeze. They’re ideal for sorting books, puzzles, or art supplies.
Idea 3: Wall-Mounted Crates for Small Items
- How to Do It: Mount individual crates on the wall using sturdy brackets or screws. Arrange them in a grid pattern or staggered design for visual interest.
- Customization: Add hooks to the bottom of the crates for hanging bags, hats, or small toys.
- Why It Works: Wall-mounted crates save floor space and are perfect for storing smaller items like art supplies, action figures, or hair accessories.
Idea 4: Upcycled Crates with Wheels for Movable Storage
- How to Do It: Attach casters or wheels to the bottom of a wooden crate to create a rolling storage cart.
- Customization: Line the crate with fabric or add dividers to create compartments for different items.
- Why It Works: Movable crates are great for shared spaces or kids who like to play in different rooms. They can easily transport toys, books, or craft supplies from one area to another.
Why Choose Wooden Crates?
- Affordable: Wooden crates are inexpensive and can often be found at craft stores, flea markets, or even repurposed from old packaging.
- Eco-Friendly: Upcycling wooden crates is a sustainable way to create storage solutions.
- Kid-Friendly: The sturdy design of wooden crates makes them durable and safe for kids’ rooms.
Pro Tip
If you’re using secondhand crates for your DIY kids storage shelf, sand them down to remove rough edges and splinters before painting or assembling. This ensures they’re safe for little hands and ready to become a functional part of your DIY kids storage shelf project.
Cube Storage Units for Versatility
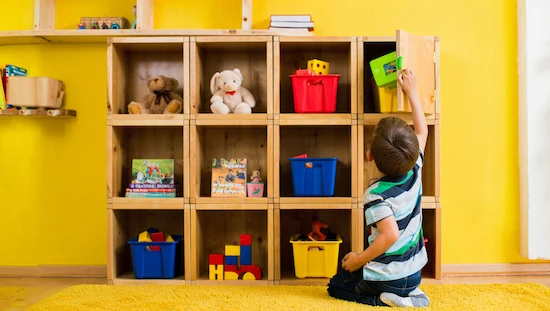
Cube storage units are a popular choice for kids’ rooms because of their versatility, modular design, and ability to adapt to changing storage needs. Whether you’re building your own DIY kids storage shelf or repurposing a store-bought unit, cube shelves can be customized to fit any space and style. Here are four creative ways to use cube storage units to create a DIY kids storage shelf that organizes your child’s room beautifully.
Idea 1: DIY Cube Shelves with Fabric Bins for Toys
- How to Do It: Build a cube storage unit using plywood or MDF boards. Divide the unit into equal-sized cubes (e.g., 12” x 12”) and secure them with wood glue and screws. Add fabric bins or baskets to each cube for hidden storage.
- Customization: Paint the frame to match your child’s room decor. Choose fabric bins in fun patterns or colors that complement the theme.
- Why It Works: Fabric bins keep toys out of sight while making cleanup quick and easy. The open cubes also allow for display space on top or in uncovered sections.
Idea 2: Color-Coded Cubes for Organizing Books and Games
- How to Do It: Assign a color to each cube based on the type of item it will store (e.g., blue for books, red for games, green for art supplies). Use paint, colored paper, or fabric liners to differentiate the cubes.
- Customization: Add labels or pictures to each cube to help younger kids identify where items belong.
- Why It Works: Color-coding makes it easy for kids to find what they need and put things back in the right place. It’s a great way to teach organization skills.
Idea 3: Cube Units with Open Shelves for Displaying Stuffed Animals
- How to Do It: Leave some cubes open (without bins) to create display spaces for stuffed animals, trophies, or other cherished items.
- Customization: Add LED strip lights inside the open cubes to highlight displayed items and create a cozy ambiance.
- Why It Works: Open cubes give kids a chance to show off their favorite toys or collections while keeping the rest of the room organized.
Idea 4: Custom-Sized Cube Shelves for Small Spaces
- How to Do It: Measure your space and build a cube unit that fits perfectly (e.g., a narrow unit for a tight corner or a tall unit for vertical storage). Adjust the size of the cubes to suit your storage needs.
- Customization: Use the top of the unit as a surface for a lamp, clock, or small plants.
- Why It Works: Custom-sized cube shelves maximize storage in small rooms without overwhelming the space. They’re ideal for apartments or shared kids’ rooms.
Why Choose Cube Storage Units?
- Modular Design: Cube units can be rearranged or expanded as your child’s storage needs change.
- Multi-Functional: They work for toys, books, clothes, art supplies, and more.
- Kid-Friendly: The low height of many cube units makes them accessible to young children.
Pro Tip
If you’re short on time, consider repurposing an IKEA Kallax unit or similar cube storage system to create a DIY kids storage shelf. You can customize it with paint, wallpaper, or decorative contact paper to match your child’s room theme, turning it into a stylish and functional DIY kids storage shelf.
Materials and Tools You’ll Nee
- Plywood or MDF boards (for DIY units)
- Fabric bins or baskets
- Paint or decorative paper
- Wood glue and screws
- Measuring tape and saw
Floating Shelves for Small Spaces
Floating shelves are a fantastic solution for small kids’ rooms because they maximize vertical space without taking up valuable floor area. These sleek and stylish shelves can be customized to fit any decor and are perfect for creating a DIY kids storage shelf that stores books, toys, and decorative items. Here are four creative ways to use floating shelves as part of your DIY kids storage shelf project to organize your child’s space beautifully.
Idea 1: Floating Shelves with Hooks for Bags and Hats
- How to Do It: Install floating shelves on the wall and add small hooks underneath for hanging bags, hats, or costumes.
- Customization: Paint the shelves in a fun color or use patterned wallpaper to cover the surface for a playful look.
- Why It Works: This idea combines storage and display space, making it perfect for small rooms. The hooks keep frequently used items within easy reach.
Idea 2: Tiered Floating Shelves for Books and Decor
- How to Do It: Install multiple floating shelves at different heights to create a tiered effect. Use the top shelves for books and the lower ones for toys or decorative items.
- Customization: Add small bookends or figurines to keep books upright and add personality to the shelves.
- Why It Works: Tiered shelves make use of vertical space and create a visually appealing display. They’re ideal for showcasing your child’s favorite books and treasures.
Idea 3: Corner Floating Shelves to Maximize Space
- How to Do It: Install triangular or L-shaped floating shelves in the corner of the room. This often-underutilized space is perfect for storing small toys, plants, or picture frames.
- Customization: Paint the shelves to match the wall color for a seamless look or use a contrasting color to make them stand out.
- Why It Works: Corner shelves are a smart way to use awkward spaces and keep the room feeling open and clutter-free.
Idea 4: Chalkboard-Painted Shelves for Labeling and Creativity
- How to Do It: Paint the surface of the floating shelves with chalkboard paint. Use chalk to label the shelves or let your child draw and write on them.
- Customization: Add small baskets or bins to the shelves for storing smaller items like crayons, action figures, or hair accessories.
- Why It Works: Chalkboard shelves are both functional and fun. They encourage creativity while helping kids stay organized.
Why Choose Floating Shelves?
- Space-Saving: Floating shelves don’t take up floor space, making them ideal for small rooms.
- Customizable: They can be painted, decorated, or arranged in endless ways to suit your child’s needs and preferences.
- Versatile: Use them for books, toys, decor, or a combination of all three.
Pro Tip
When installing floating shelves for your DIY kids storage shelf, make sure they’re securely anchored to the wall, especially if they’ll hold heavier items like books. Use wall anchors or brackets for added stability, ensuring your DIY kids storage shelf is both safe and functional.
Materials and Tools You’ll Need
- Wooden boards or pre-made floating shelves
- Chalkboard paint (optional)
- Hooks (for Idea 1)
- Wall anchors or brackets
- Screws and a drill
- Sandpaper (to smooth rough edges)
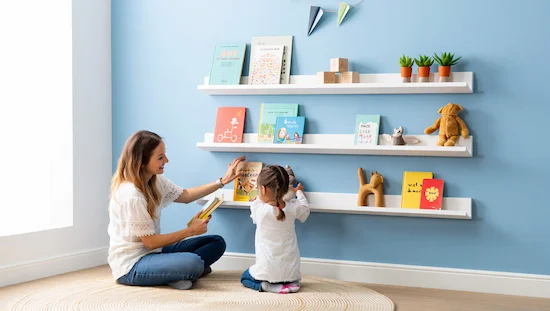
Montessori-Inspired Storage Solutions
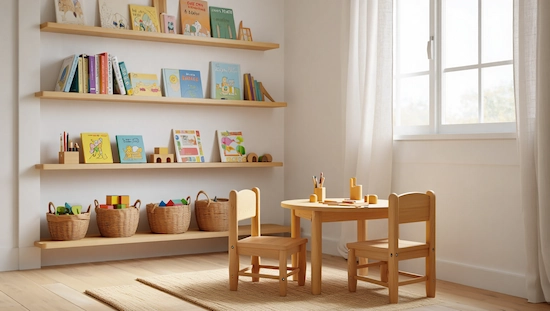
Montessori principles emphasize independence, accessibility, and organization, making them perfect for designing functional and child-friendly storage solutions. A DIY kids storage shelf inspired by Montessori methods can help your child learn to tidy up independently while keeping their space clutter-free. With a DIY kids storage shelf, you can create a space that encourages independence and creativity. Here are four creative ideas to bring Montessori organization into your child’s room using a DIY kids storage shelf.
Idea 1: Low-Height Shelves for Easy Access to Toys
- How to Do It: Build or repurpose low-height shelves that are within easy reach of your child. Use simple, open designs without doors or complicated mechanisms.
- Customization: Paint the shelves in neutral or calming colors to create a peaceful environment. Add small labels with pictures or words to help your child identify where items belong.
- Why It Works: Low-height shelves empower kids to access and put away their toys independently, fostering a sense of responsibility and organization.
Idea 2: Open Shelves with Baskets for Sorting Activities
- How to Do It: Use open shelves with small baskets or trays to sort toys, puzzles, or art supplies. Each basket should hold one type of item to make cleanup easier.
- Customization: Choose natural materials like wicker or wooden baskets for a Montessori-inspired look. Label each basket with a picture or word to help your child identify its contents.
- Why It Works: Open shelves with baskets encourage kids to sort and categorize their belongings, promoting cognitive development and organization skills.
Idea 3: DIY Pegboard Shelves for Hanging Items
- How to Do It: Install a pegboard on the wall and add shelves, hooks, and bins to create a versatile storage system. Use the pegboard to hang items like costumes, art supplies, or small bags.
- Customization: Paint the pegboard in a fun color or let your child decorate it with stickers or drawings. Arrange the shelves and hooks to suit your child’s needs.
- Why It Works: Pegboard shelves are highly customizable and grow with your child. They’re perfect for storing items that are used frequently and need to be easily accessible.
Idea 4: Minimalist Wooden Shelves for a Clean, Organized Look
- How to Do It: Build simple, minimalist wooden shelves with clean lines and a natural finish. Keep the design uncluttered and focus on functionality.
- Customization: Add a few decorative touches, like a small plant or framed picture, to make the shelves feel personal without overwhelming the space.
- Why It Works: Minimalist shelves create a calm and organized environment, helping kids focus on their activities and reducing visual clutter.
Why Choose Montessori-Inspired Storage?
- Promotes Independence: Montessori storage solutions are designed to be accessible to kids, encouraging them to take charge of their own space.
- Encourages Organization: Open shelves, baskets, and labels help kids learn to sort and put away their belongings.
- Adaptable: These ideas can be customized to fit any room size or style, making them a versatile choice for DIY kids storage shelf projects.
Pro Tip
When designing Montessori-inspired storage for your DIY kids storage shelf, involve your child in the process. Let them choose baskets, labels, or colors to make the space feel more personal and encourage them to use it. This way, your DIY kids storage shelf becomes a collaborative project that fosters independence and organization.
Materials and Tools You’ll Need
- Wooden boards or pre-made shelves
- Wicker or wooden baskets
- Pegboard and hooks (for Idea 3)
- Labels (with pictures or words)
- Paint or stain (optional)
- Screws and a drill
Creative and Fun-Themed Shelves

Why settle for ordinary shelves when you can create something truly unique and exciting? A DIY kids storage shelf with a fun theme not only organizes your child’s room but also adds a playful touch that sparks their imagination. With a DIY kids storage shelf, you can turn storage into a creative and engaging part of your child’s space. Here are four creative and themed shelf ideas to inspire your next DIY kids storage shelf project!
Idea 1: Animal-Shaped Shelves for a Playful Touch
- How to Do It: Cut wooden boards into animal shapes (e.g., a bear, elephant, or giraffe) and assemble them into shelves. Use the animal’s body as the base and its legs or tail as supports.
- Customization: Paint the animal shelves in bright colors or patterns to match your child’s room decor. Add googly eyes or felt ears for extra charm.
- Why It Works: Animal-shaped shelves are both functional and decorative, making them a fun addition to any kid’s room. They’re perfect for storing books, small toys, or stuffed animals.
Idea 2: DIY Tree-Shaped Shelves for Books and Toys
- How to Do It: Create a tree-shaped shelf by cutting a large tree trunk and branches from plywood. Mount the tree on the wall and use the branches as individual shelves.
- Customization: Add leaves made from felt or paper to the branches for a whimsical touch. You can also paint the tree in natural colors or go bold with rainbow hues.
- Why It Works: Tree-shaped shelves bring a nature-inspired theme to the room while providing ample storage for books, toys, and decorative items.
Idea 3: Rainbow-Colored Shelves for a Vibrant Look
- How to Do It: Build simple rectangular or floating shelves and paint each one a different color of the rainbow. Arrange them in a gradient or random pattern.
- Customization: Add cloud-shaped cutouts or gold star decals for a magical touch. Use the shelves to display colorful toys, books, or art supplies.
- Why It Works: Rainbow shelves add a burst of color and joy to the room, making organization feel fun and exciting for kids.
Idea 4: DIY Car or Train-Themed Shelves for Toy Storage
- How to Do It: Create shelves shaped like cars, trains, or trucks. Use wooden boxes or crates as the base and add wheels, windows, and other details with paint or cutouts.
- Customization: Paint the shelves to match your child’s favorite vehicles or use bold primary colors for a classic look. Add tracks or roads on the wall for a cohesive theme.
- Why It Works: Car or train-themed shelves are perfect for kids who love vehicles. They’re great for storing toy cars, action figures, or small books.
Why Choose Fun-Themed Shelves?
- Encourages Creativity: Themed shelves spark your child’s imagination and make their room feel like a magical space.
- Personalized Storage: These shelves can be customized to reflect your child’s interests, whether they love animals, nature, or vehicles.
- Functional and Decorative: A DIY kids storage shelf with a fun theme not only organizes the room but also serves as a decorative focal point.
Pro Tip
When designing themed shelves, involve your child in the process. Let them choose the theme, colors, or decorations to make the project even more special and meaningful.
Materials and Tools You’ll Need
- Plywood or wooden boards
- Paint (in various colors)
- Felt, paper, or decals (for decorations)
- Wood glue and screws
- Jigsaw or handsaw (for cutting shapes)
- Sandpaper (to smooth rough edges)
What You’ll Need to Get Started
“Before diving into your DIY kids’ storage shelf project, it’s important to gather all the necessary materials and tools. Having everything on hand will make the process smoother and more enjoyable. Whether you’re building a DIY kids storage shelf from scratch or repurposing existing items, here’s a detailed list of what you’ll need, along with tips for finding affordable and eco-friendly options for your DIY kids storage shelf.”
Materials
- Wooden Boards or Crates:
- Plywood, MDF, or solid wood boards for building shelves.
- Wooden crates for quick and easy storage solutions.
- Tip: Check local hardware stores, flea markets, or online marketplaces for affordable options. Upcycled crates or pallets are eco-friendly and budget-friendly choices.
- Paint and Finish:
- Non-toxic paint in colors that match your child’s room decor.
- Chalkboard paint for customizable labels or creative surfaces.
- Wood stain or sealant for a natural finish.
- Tip: Look for water-based, low-VOC paints that are safe for kids’ furniture.
- Fabric Bins or Baskets:
- Wicker, fabric, or plastic bins for organizing smaller items.
- Tip: Choose bins with fun patterns or colors to add a playful touch to your shelves.
- Hardware:
- Screws, nails, and brackets for assembling shelves.
- Wall anchors for securely mounting floating shelves.
- Hooks or pegs for hanging items like bags or costumes.
- Tip: Invest in sturdy hardware to ensure the shelves are safe and durable.
- Decorative Elements:
- Stencils, stickers, or decals for adding fun designs.
- Felt, paper, or fabric for creating themed decorations.
- Tip: Involve your child in choosing decorations to make the project more personal.
Tools
- Measuring Tape and Pencil:
- For accurate measurements and marking cuts.
- Saw:
- A handsaw, jigsaw, or circular saw for cutting wood to size.
- Drill and Screwdriver:
- For assembling shelves and attaching hardware.
- Sandpaper or Sander:
- To smooth rough edges and surfaces for a safe, kid-friendly finish.
- Paintbrushes or Rollers:
- For applying paint or stain evenly.
- Level:
- To ensure shelves are straight and properly aligned during installation.
Where to Find Materials
- Local Hardware Stores: Great for wood, paint, and hardware.
- Thrift Stores or Flea Markets: Perfect for finding wooden crates or baskets at a low cost.
- Online Marketplaces: Websites like Amazon, Etsy, or Facebook Marketplace often have affordable materials and tools.
- Eco-Friendly Options: Look for reclaimed wood or upcycled materials to reduce waste and save money.
Pro Tip
If you’re new to DIY projects, start with a simple design like stacked wooden crates or a basic cube shelf. As you gain confidence, you can tackle more complex projects like themed or floating shelves.
Safety First: Tips for DIY Kids’ Furniture
When building a DIY kids storage shelf, safety should always be your top priority. Kids are naturally curious and love to explore, so it’s essential to create furniture that’s not only functional but also safe for them to use. Here are some key tips to keep in mind as you work on your project:
1. Use Non-Toxic Materials
- Why It Matters: Kids often touch, lean on, or even chew on furniture, so it’s important to use non-toxic paints, stains, and finishes.
- How to Do It: Choose water-based, low-VOC (volatile organic compounds) paints and sealants. Avoid products with harsh chemicals or strong fumes.
- Pro Tip: Look for labels like “child-safe” or “non-toxic” when selecting materials for your DIY kids storage shelf.
2. Secure Shelves to the Wall
- Why It Matters: Kids love to climb, and unsecured furniture can tip over, causing serious injuries.
- How to Do It: Use sturdy wall anchors or brackets to mount shelves securely. For freestanding units, ensure they have a wide and stable base.
- Pro Tip: Follow the manufacturer’s instructions for wall anchors or consult a hardware store expert for advice on the best options for your project.
3. Sand Down Rough Edges
- Why It Matters: Rough or sharp edges can cause splinters or cuts, especially on a DIY kids storage shelf that little hands will touch frequently.
- How to Do It: Use sandpaper or a sander to smooth all edges and surfaces. Pay extra attention to corners and any areas where wood has been cut.
- Pro Tip: Run your hand over the finished shelf to check for any rough spots before letting your child use it.
4. Avoid Small Parts or Loose Hardware
- Why It Matters: Small screws, nails, or decorative pieces can become choking hazards if they come loose.
- How to Do It: Use child-safe hardware and ensure all screws and nails are tightly secured. Avoid adding small decorative elements that could easily detach.
- Pro Tip: Regularly check the shelf for loose parts and tighten them as needed.
5. Keep Shelves at a Safe Height
- Why It Matters: Shelves that are too high can encourage climbing, while those that are too low might not be practical for storage.
- How to Do It: For younger kids, keep shelves at a height they can easily reach without climbing. For older kids, ensure the shelves are securely mounted and out of reach of younger siblings.
- Pro Tip: Use a step stool for higher shelves, but make sure it’s stable and only used with adult supervision.
6. Test Stability and Weight Capacity
- Why It Matters: Overloading shelves or using unstable materials can lead to accidents.
- How to Do It: Test the stability of your DIY kids storage shelf by gently shaking it after assembly. Ensure it can hold the weight of toys, books, or other items without wobbling.
- Pro Tip: Distribute weight evenly across the shelves and avoid placing heavy items on higher shelves.
7. Supervise Kids Around DIY Projects
- Why It Matters: Kids are naturally curious and may want to “help” with the project, but tools and materials can be dangerous.
- How to Do It: Keep kids at a safe distance while you’re working. If they want to be involved, let them help with non-hazardous tasks like painting (with supervision).
- Pro Tip: Store tools and materials out of reach when not in use to prevent accidents.
Why Safety Matters
A DIY kids storage shelf is more than just a piece of furniture—it’s a part of your child’s daily life. By prioritizing safety, you can create a space that’s not only organized but also secure and enjoyable for your little one.
Pro Tip
Before letting your child use the shelf, do a final safety check. Look for sharp edges, loose parts, and stability issues. It’s better to spend a little extra time ensuring everything is safe than to risk an accident.
")
13 thoughts on “10 Adorable DIY Kids Storage Shelf Ideas to Organize Your Child’s Space”
Comments are closed.