
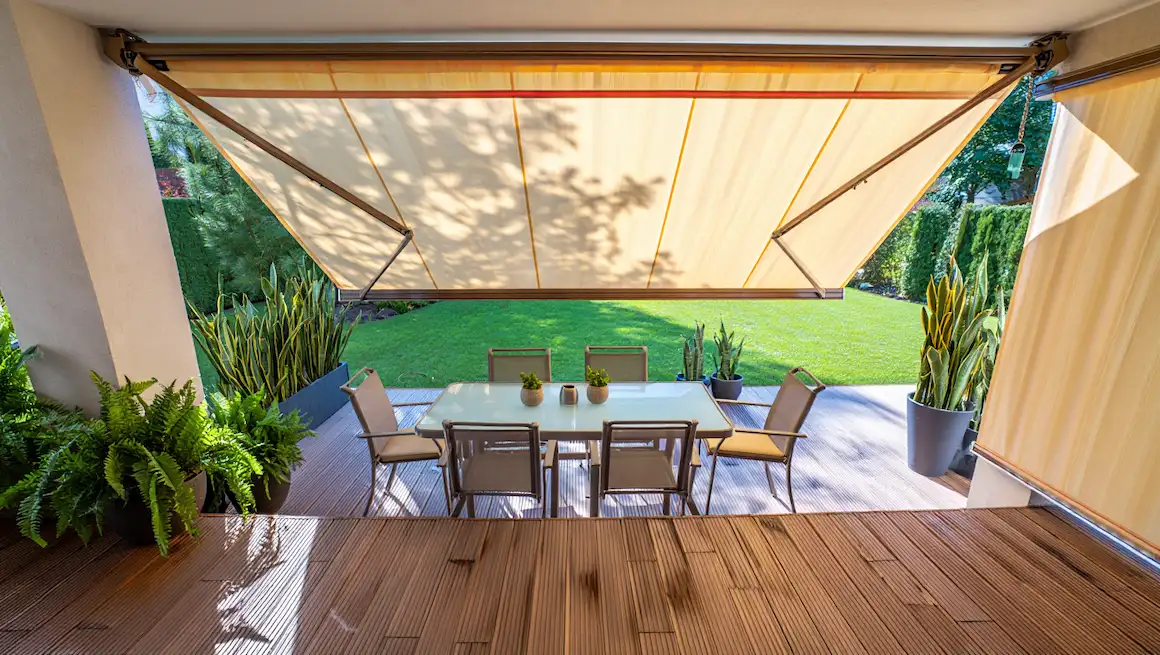
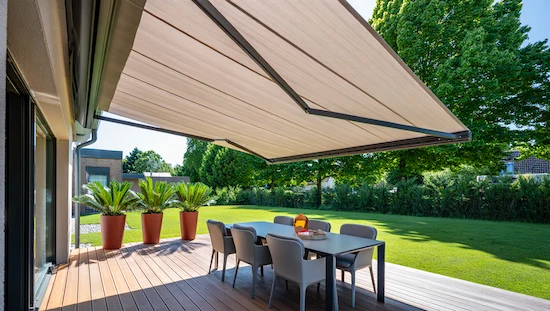
DIY retractable awning kits are a popular solution for anyone wanting to create covered outdoor seating areas on patios, decks, or pergolas. You get the flexibility to extend your diy retractable awning for shade or retract it for sun, often at a lower cost than professional installation.
With the right materials and a bit of DIY spirit, you can customize your outdoor space for year-round comfort and convenience—no contractor required. Whether you’re looking for budget-friendly shade, an upgrade for your backyard, or a hands-on weekend project, a diy retractable awning kit puts control and comfort in your hands. diy retractable awning
diy retractable awning kits
Build-Your-Own Retractable Awning Kits
DIY retractable awning kits are a popular solution for anyone wanting to create covered outdoor seating areas on patios, decks, or pergolas. You get the flexibility to extend your diy retractable awning for shade or retract it for sun, often at a lower cost than professional installation.
Main Components and Materials Needed
- (8) 1″ diameter PVC pipes, 10′ long
- Drill and small drill bit
- Measuring tape and marker
- (16) 1″ PVC slip-on caps
- Spray paint and drop cloth
- 15-1/2 yards sailcloth (weather-resistant, durable fabric)
- 3 spools white outdoor polyester thread
- Sewing machine and scissors/rotary cutter
- (40) #8 eye screws
- (2) 4″x4″x8′ posts (support structure)
- (6) carriage bolts, washers, and nuts
- Long 1/4″ drill bit
- (1) 2″x10″x12′ plank
- (1) 2″x8″x12′ plank
- (24) 3-1/2″ wood screws
- Paint or stain/sealer, paint roller & pan
- (10) #6 eye screws
- 90′ 3/32″ wire cable rope
- (5) turnbuckles (with 1 eye screw and 1 hook each)
- (10) 3/32″ cable ferrules
- Swagging tool
Step-by-Step Instructions
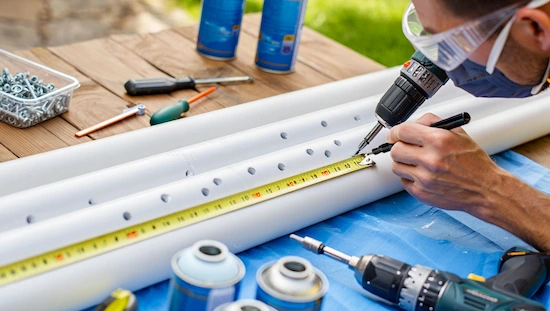
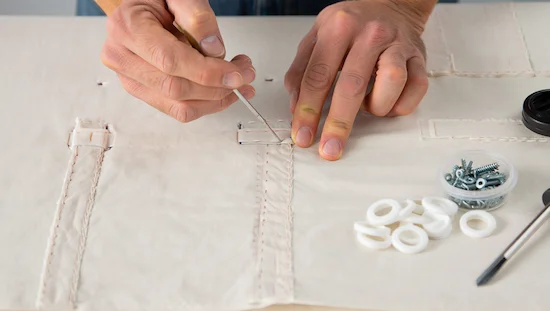
Step 1. Prepare the Rods
- Mark five spots on each PVC pipe (1-1/4”, 30-3/4”, 60-1/4”, 89-3/4”, 119-1/4”) for eye screw placement.
- Drill holes at these marks using a drill bit slightly smaller than the #8 eye screws.
- Spray paint rods and slip-on caps for durability and let them dry completely. diy retractable awning
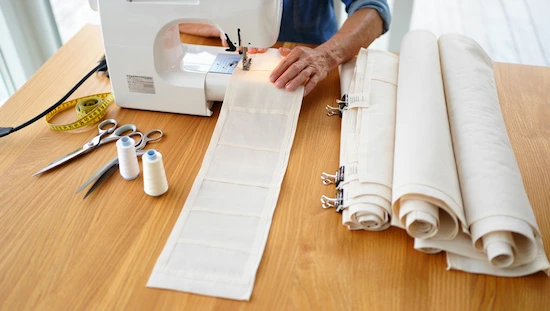
Step 2. Sew the Shade
- Cut the fabric into four long panels (10’4” each) and 32 pocket pieces (4-1/2” x 27”).
- Sew panels together with ½” seam allowance, then topstitch for strength.
- Cut a 14-3/4” strip from one outer panel and attach to the opposite panel for correct width.
- Hem all four sides (1” hem) for clean edges.
- Tip: Roll up sides while sewing for better control.
Step 3. Add Rods to the Shade
- Mark two lines, 1-1/2″ apart, along seams for rod pockets.
- Fold and stitch pocket pieces; attach along marked lines, 4” apart.
- Sew pockets in place and insert PVC rods.
- Attach #8 eye screws to holes in rods; add slip-on caps.
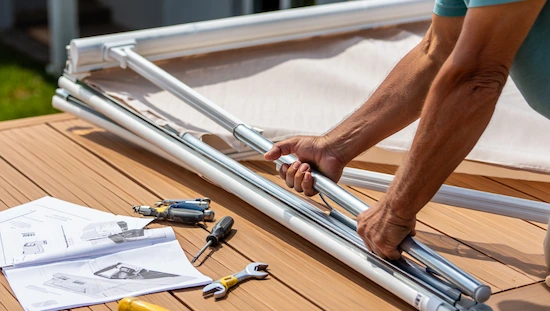
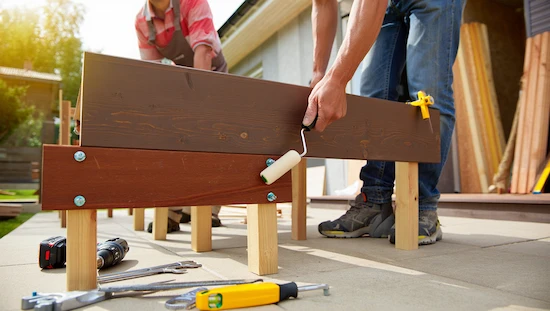
Step 4. Build the Support
- Attach 4”x4” posts to a solid structure or set in concrete, spaced 10’6″ apart. Secure with carriage bolts.
- Center and secure 2”x10” plank on top.
- Attach 2”x8” plank to back for added support.
- Paint or seal wood elements for weather protection.
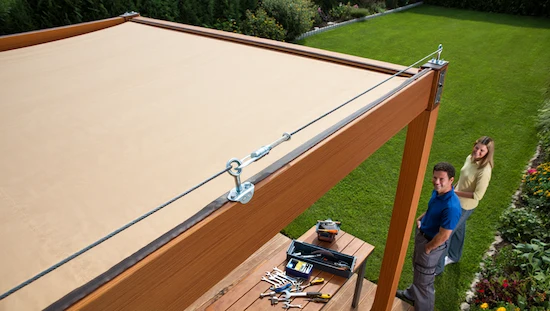
Step 5. Install the DIY Canopy
- Mark and pre-drill for #6 eye screws (center, two on each side, 29-1/2” apart).
- Cut five cables (18’ each), secure to back board with ferrules and swagging tool.
- Thread cables through rods’ eye screws.
- Attach turnbuckles to corresponding structure.
- With help, lift the shade and rods, secure other end of cables to turnbuckles, and tighten to remove slack.
Additional Notes & Tips
- The awning is lightweight, but heavier materials require more structural support.
- At least two people are needed for installation.
- Sailcloth is recommended for weather resistance and comes in wide rolls (usually 60”).
- Example project size is 10′ x 17′; adjust materials for your space.
- Painting or sealing wood extends lifespan.
- This is a budget-friendly, customizable retractable awning project.
retractable awning costco
Adjustable Awning from Warehouse Club
Looking for a convenient, ready-to-install diy retractable awning kit? Costco’s SunSetter Premium Series is a top choice for DIYers. These awnings offer:
- Motorized or semi-cassette models for all-weather protection
- SunSetter Performance Acrylic fabrics with a 10-year limited warranty
- Energy efficiency—block up to 98% of harmful UV rays, reduce indoor heat, and lower AC costs
- Motorized operation at the touch of a button (remote/wireless wind sensor included)
- Blocks sun, protects guests/furniture, and can cool your patio by up to 20°F
- Affordable, high-quality features, shipping included (except AK, HI, PR)
- Returnable at any Costco warehouse worldwide
Why buy from Costco?
- Industry-leading warranty
- America’s #1 selling awning for over 20 years
- Satisfaction guarantee on membership and merchandise
Enhance Your Investment:
Retractable awnings not only add comfort and style but also boost property value and energy efficiency. Custom diy retractable awning options are available to match your home’s decor. Learn more or shop at Costco.
Authoritative Source:
retractable awning for deck
Pull-Out Deck Canopy
A retractable awning for deck privacy and comfort is one of the smartest upgrades for backyard living. A diy retractable awning delivers flexible shade and convenience. Here’s how it works and why it matters:
Why Privacy Matters
A diy retractable awning for deck spaces creates a tranquil retreat for relaxing, entertaining, and socializing. It blocks prying eyes, shields from the elements, and defines your outdoor living space with style.
Benefits
- Flexibility: Easily adjust shade and privacy by extending/retracting the awning.
- Customizable Coverage: Choose size/shape for your deck, patio, or pool.
- Protection: Shields from sun, rain, and wind.
- Aesthetic Enhancement: Fabrics, patterns, and frame colors can be matched to your backyard.
- Energy Efficiency: Lowers home temperature, reduces AC bills.
- Improved Outdoor Living: Turns exposed decks into sheltered, private retreats.
Types of Retractable Awnings for Decks
- Manual: Operated by hand crank; more affordable, lower maintenance.
- Motorized: Remote control or sensor; convenient and hands-free.
- Vertical (Side Screens): For privacy/shade along deck sides.
- Lateral Arm: Horizontal arms, ideal for large decks/patios.
Materials
- Acrylic: Fade/moisture resistant, UV blocking, many colors.
- Vinyl: Water-resistant, best for humid/rainy climates.
- Polyester: Budget-friendly, treated for weather resistance.
FAQs
- Privacy: Extended awnings create a visual barrier.
- Weather: Retract during storms/heavy wind.
- Sizing: Measure your deck for best fit.
- Customization: Huge range of options.
- Motorized Worth It?: More convenient, but pricier.
Pros & Cons
Pros
- Cools your home by up to 15°F
- Protects furniture/patio surfaces from sun
- Flexible: retracts during storms, extends for sun
- Good return on investment (ROI)
- Convenient options: motorized/manual
Cons
- Higher upfront cost
- Regular maintenance/cleaning required
- Sensor repairs can be expensive (for motorized)
- Not for all weather (retract during heavy rain/wind)
- Typically last 10–12 years
motorized retractable awning for deck
Automated Deck Sunshade
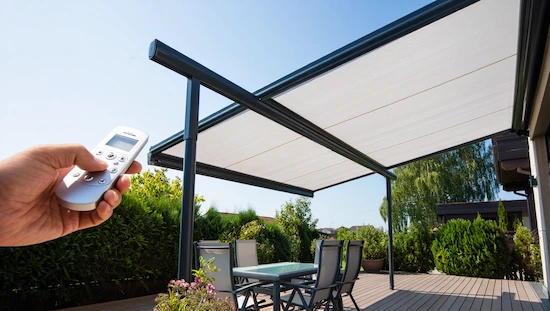
Motorized retractable awnings for decks bring effortless, instant shade—perfect for tech-forward outdoor living.
Technology & Components
- Awning Fabric: Provides shade/protection; attaches to a durable framework.
- Framework: Aluminum/steel arms, roller tube, structural elements.
- Motor: Electric-powered, controlled by remote/app/home automation; efficient, quiet, safety features.
- Remote Control: Operate via remote, wall panel, or smartphone/voice commands.
- Sensors: Optional wind/sun/rain sensors automate extension/retraction for weather protection.
Operation
- Motor turns roller tube to extend/retract awning fabric.
- Sensors can retract during wind/rain or extend for sun protection.
Types
- Lateral Arm, Semi-Cassette, Cassette: Offer various levels of sun/water protection (cassette provides the most).
Benefits
- Effortless Operation: Push-button control, smart home compatibility.
- Protection: Shields from UV, rain, wind; creates comfortable deck spaces.
- Energy Efficiency: Reduces cooling costs and AC use.
- Customization: Many fabric/colors/patterns and smart features (integrated lighting, sensors).
- Cassette Housing: Protects awning when retracted; extends product life.
Materials
- Acrylic, polyester, vinyl-coated polyester for durability and style.
Installation & Maintenance
- Professional installation is recommended for safety and warranty. Many brands (e.g., Somfy) have dealer networks.
- Maintenance: Clean with soap/water, inspect for issues; repairs should be handled by pros.
Choosing the Right Model
- Measure your deck; pick quality, UV/mildew-resistant fabrics.
- Consider custom features, colors, and warranty.
Advantages
- Instant shade, comfort, energy savings, property value boost, and minimal maintenance are some of the main benefits of a diy retractable awning.
motorized retractable awnings prices
Motorized Retractable Awning Price List
Motorized retractable awnings prices vary widely based on operation, size, material, quality, installation, and brand.
Key Price Factors
- Operation
Motorized awnings are more expensive than manual ones due to the inclusion of advanced features (remotes, sensors, automation). - Size
- Window awning: $800–$1,400
- Door awning: $300–$800
- Deck/patio awning: $1,500–$6,500
- Material
Metal/aluminum (often motorized) cost more; premium fabrics (UV-resistant, waterproof) and volants add to price. - Quality
Higher quality equals higher price, but cheaper awnings may require more repairs. - Application
Large/custom/commercial projects cost more. - Installation
Professional installation recommended for motorized awnings; costs $350 (window) to $25,000+ (large/commercial). DIY saves $500–$1,200 but is best for small/manual awnings. - Maintenance & Repairs
Motorized repair: $1,500–$6,500
Motor repair: $450–$950
Awning fabric repair: $500–$1,800
Lubrication: $20–$50
Awning frame: $500–$1,800
Re-attach frame: $300–$500
2025 Price Ranges
- Manual retractable awnings: $1,200–$4,500
- Motorized awnings (awning only): $1,500–$8,000
- Retractable drop arm awning: $800–$1,400
- Large motorized vertical awning: $3,000–$8,000+
Average Full Install: $2,000–$3,500 (all types/brands)
Additional Info
- Materials: All-weather fabric ($300–$2,000), Aluminum ($300–$2,500), Motorization adds $1,000–$3,000
- Popular brands: SunSetter ($800–$4,000), Awntech, Beauty-Mark, ALEKO, Americana
- Larger spaces can cost $3,500–$6,500+
- High-end awnings: 5-year warranties
Summary Table
| Type/Component | Typical Price Range (USD) |
|---|---|
| Motorized awning (awning only) | $1,500–$8,000 |
| Average full install | $2,000–$3,500 |
| Motorized repair | $1,500–$6,500 |
| Motor repair | $450–$950 |
| Installation | $350–$3,000+ |
Key Takeaways
- Motorized retractable awnings are more expensive than manual ($1,500–$8,000 for the awning; $2,000–$3,500 installed).
- Factors: motorization, size, material, brand, installation.
- Professional installation and high-end features increase costs.
- Maintenance/repairs are pricier for motorized models.
Source:
Details for all prices/features from: Angi.com – How Much Do Retractable Awnings Cost?
retractable awning for house
Extendable Home Canopy
Retractable awning for house installations add shade, comfort, and weather protection to decks, patios, and more. Here’s what to know:
Overview and Purpose
- Retractable awnings offer shade, UV protection, and shelter from light rain.
- Motorized options allow push-button extension/retraction for convenience.
Installation Process (DIY or Professional)
- Preparation:
Use ladder/power tools; check permits/homeowner association rules; finish painting/siding first. - Height Determination:
Allow 7.5–8 ft. clearance from ground, 12–14 inches above windows, and enough for outswing doors. Wall, soffit, fascia, or roof mounting possible. - Marking Mounting Location:
Mark bracket locations precisely; ensure attachment to studs/rafters/headers for support. - Bracket Installation:
Use the correct bracket for your surface (masonry, brick, siding). Drill and secure with hardware. - Awning Installation:
Requires two people; lift and secure awning in brackets, attach bolts, and any side supports as needed. Connect motor/manual crank as required.
Types and Shapes
- Types: Patio, window, door, side awnings
- Shapes: Sloped (best for patios), concave/convex/domed (decorative, usually for windows/doors), flat (can collect debris).
Retractability Options
- Manual: Hand crank/pulley; affordable, no electricity.
- Motorized: Button/remote control; requires electricity; higher cost.
- Fixed: Stationary; always provides shade.
- Portable: Pop-up for temporary/movable shade.
Materials Used
- Canvas, vinyl, acrylic, metal (aluminum), polycarbonate—all with different durability, looks, and maintenance.
Costs
- Average: $1,400–$4,500 (with install)
- Window: $250–$500
- Patio/deck: Up to $3,500
- Accessories: Add up to $350
- Professional install: $100–$400
- DIY savings: $100–$400
- Permit: $25–$100
Maintenance
- Trim trees; clean yearly; check for wear/damage; lubricate moving parts; never retract/store when wet.
Fixed vs. Retractable
- Fixed: Always provides shade, low-maintenance, not adjustable.
- Retractable: Flexible, takes less space when closed, more expensive, shorter lifespan.
Common Use Cases
- Patio awning: Shade/UV protection, sometimes rain
- Window: Reduces indoor glare, helps cooling
- Door: Protects entryways/guests, adds curb appeal
- Side: Privacy/wind protection for balconies
Choosing the Right Awning
- Placement/purpose, shape/style, material, and retractability all factor in
- Sunbrella fabric highly rated for durability and fade resistance
Professional Installation
- Ensures safety, security, and best angle for coverage; especially vital for heavy or motorized diy retractable awning models.
FAQs
- Awnings vs. Pergolas: Awnings retract, pergolas are permanent
- Maintenance: Minimal, but vital for longevity
- Home Value: Boosts comfort and curb appeal
manual retractable awnings
Hand-Operated Folding Shade
Manual retractable awnings are classic, affordable, and reliable for any patio, deck, or window. A diy retractable awning provides a practical solution for flexible outdoor shade. Here’s everything you need to know:
Definition & Operation
- Manual retractable awnings are shading systems with a metal frame and fabric cover, mounted to the wall/roof, extended or retracted by hand using a crank or pulley.
- No electricity required—completely manual.
Key Components
- Frame: Usually aluminum or steel, provides stability.
- Fabric: Acrylic, polyester, or PVC-coated for durability and weather-resistance.
- Manual Crank/Pulley: Hand-operated extension/retraction.
- Arms: Metal supports, often vertical for stability.
- Brackets/Hardware: Secure awning to wall/support.
How They Work
- Setup/Installation: Frame is secured to mounting brackets; fabric attaches to arms.
- Extending: Turn crank/use pulley to extend arms and roll out fabric.
- Adjusting Angle: Many allow angle/pitch adjustments for best sun coverage.
- Securing: Some models lock in place for stability.
- Retracting: Reverse crank/pulley to roll fabric in and fold arms against wall.
- Storage: Compact and protected when retracted.
Advantages
- Cost-Effective: Cheaper than motorized; no electrical hookup.
- No Power Needed: Works during outages.
- Simple Construction: Fewer parts, less prone to failure.
- Stable: Vertical rods are sturdy in wind.
- Easy to Use: Modern cranks operate smoothly.
- Customizable: Available in many sizes/colors.
- Energy Efficient: Blocks sun, reduces AC costs.
- Low Maintenance: No electrical issues.
Disadvantages
- Requires manual effort to operate.
- No automated features (no sensors/remote).
- Should retract in strong wind/heavy rain.
Comparison with Motorized
- Motorized: Powered by electricity, remote/button control, sensors, more features, better for limited mobility, often sleeker.
- Manual: Human-powered, lower cost, more stable, works in outages.
Tips for Use & Maintenance
- Install on the sunniest side for best shade.
- Use gentle motion to avoid damage.
- Clean fabric with mild soap, let dry before retracting.
- Retract during storms.
- Regularly inspect for wear.
FAQs
- How to Open/Close? Turn hand crank, easy and smooth.
- Install Yourself? Possible for small models; pros recommended for large ones.
- Wind/Rain? Not recommended for strong weather.
- Partial Extension? Yes—stop at any point.
People Also Ask (FAQ)
Q1: Can I install a diy retractable awning kit myself?
Yes, with the right tools and at least one helper, you can install a diy retractable awning kit using PVC pipes and sailcloth. A diy retractable awning is designed for homeowner installation—just be sure to check local codes and follow the step-by-step instructions for safety and best results. For large or motorized awnings, professional installation is recommended.
Q2: How long do retractable awnings last?
A high-quality diy retractable awning kit can last 5–15 years, depending on fabric, climate, and care. Frames outlast fabric, which may need replacing after several years. Proper maintenance and retracting during winter/bad weather extend lifespan.
Q3: What are the benefits of a motorized retractable awning for deck spaces?
Motorized awnings offer instant shade at the push of a button, smart automation (sensors for wind/sun), protection from weather, and energy efficiency. While a diy retractable awning can provide affordable shade and customization, motorized retractable awnings are ideal for those who want maximum convenience, comfort, and increased property value.
Q4: Are manual retractable awnings better than motorized?
Manual retractable awnings are more affordable, stable, and require no power. A diy retractable awning offers these benefits, making it a popular choice for budget-conscious homeowners. Motorized models are easier for those with limited mobility and can be automated but are pricier and need electricity. The choice depends on your budget and needs.
Q5: How much does a motorized retractable awning cost?
Expect $1,500–$8,000 for the awning itself; installed, most pay $2,000–$3,500. Factors include size, materials, brand, features, and installation method. See detailed price breakdowns at Angi.com.
Conclusion
A diy retractable awning is a cost-effective way to upgrade your patio, deck, or outdoor space—offering flexible shade, comfort, and property value. Whether you opt for a diy retractable awning kit, a Costco SunSetter, or a motorized model, you’ll enjoy customizable coverage and lasting benefits. For best results, choose quality materials, follow detailed instructions, and invest in regular care for your diy retractable awning.
Ready to transform your outdoor living?
- Start your own project with a diy retractable awning kit
- Explore top brands like SunSetter or Somfy for motorized convenience
- Consult a pro for custom, long-lasting installation
- For more step-by-step guides and maintenance tips,
")