
Are you tired of uneven cuts and wasted materials in your woodworking projects? A diy saw guide might be the solution you’ve been looking for! Whether you’re using a circular saw, table saw, or even a hand saw, a diy saw guide ensures precision and accuracy, helping you achieve professional-quality results every time.
In this guide, we’ll walk you through everything you need to know about building your own diy saw guide. From the tools and materials required to step-by-step instructions and expert tips, you’ll learn how to create a custom guide that fits your specific needs. Not only will this save you money, but it will also elevate your woodworking skills to the next level.
Ready to make perfectly straight cuts with ease? Let’s dive into the world of DIY saw guides and get started on this simple yet transformative project!
Why You Need a DIY Saw Guide

If you’re serious about woodworking, a diy saw guide is an essential tool that can transform the way you work. Whether you’re a beginner or a seasoned pro, here’s why building your own DIY saw guide is a game-changer:
1. Achieve Precision Cutting
One of the biggest challenges in woodworking is making perfectly straight cuts. Even the steadiest hand can struggle with accuracy, especially when working with large sheets of plywood or hardwoods. A diy saw guide eliminates guesswork, ensuring every cut is precise and clean. This is especially useful for projects like building furniture, cabinets, or shelves, where even a slight deviation can throw everything off.
2. Save Money
Store-bought saw guides can be expensive, and they may not always fit your specific needs. By building your own DIY saw guide, you can save money while creating a tool that’s tailored to your projects. All you need are a few affordable materials and basic tools, making this a budget-friendly solution for any woodworker.
3. Ensure Straight Cuts Every Time
Whether you’re using a circular saw, table saw, or even a hand saw, a diy saw guide guarantees straight cuts. This is particularly helpful for long cuts or when working with large materials. No more wobbly lines or uneven edges—just smooth, professional-quality results.
4. Customize to Fit Your Needs
Every woodworker has unique requirements, and a diy saw guide allows you to customize the tool to suit your specific projects. Need a guide for cutting plywood? Building one for angled cuts? With a DIY saw guide, you can design it to match your exact needs, ensuring maximum versatility in your workshop.
5. Improve Efficiency and Reduce Waste
A diy saw guide not only improves accuracy but also speeds up your workflow. You’ll spend less time measuring and adjusting, and more time cutting. Plus, precise cuts mean less material waste, saving you money and reducing your environmental footprint.
Real-Life Applications
- Furniture Building: Create perfectly straight edges for tables, chairs, and cabinets.
- Home Renovation: Cut plywood or trim with precision for flooring, walls, or ceilings.
- Craft Projects: Ensure clean, accurate cuts for smaller diy projects like picture frames or shelves.
Tools and Materials Needed for Your DIY Saw Guide

Building a DIY saw guide is a straightforward project, but having the right tools and materials is essential for success. Whether you’re a seasoned woodworker or a beginner, this list will ensure you have everything you need to create a durable and accurate diy saw guide.
1. Essential Tools
- Circular Saw or Table Saw: The primary tool you’ll use with your diy saw guide. Ensure it’s in good working condition.
- Measuring Tape: Accurate measurements are crucial for building a precise diy saw guide.
- Clamps: These will hold your guide in place while you work, ensuring stability and accuracy.
- Drill and Drill Bits: Needed for creating holes to secure the guide rail or straight edge.
- Level: Ensures your DIY saw guide is perfectly straight during assembly.
- Pencil or Marker: For marking measurements and cut lines on your materials.
- Sawhorses or Workbench: Provides a stable surface for assembling your diy saw guide.
2. Materials Required
- Plywood or MDF: These are ideal for the base of your diy saw guide because they’re flat, sturdy, and easy to cut.
- Straight Edge or Aluminum Strip: This will serve as the guide rail for your saw. Choose a material that’s rigid and straight.
- Screws: Use wood screws or machine screws to attach the guide rail to the base.
- Sandpaper: For smoothing any rough edges on your diy saw guide.
- Wood Glue (Optional): Adds extra stability when attaching the guide rail to the base.
3. Optional but Helpful Items
- Router: If you want to create a more advanced diy saw guide with a T-track for added versatility.
- Safety Gear: Gloves, goggles, and ear protection to keep you safe while working.
- Square: Helps ensure your diy saw guide is perfectly aligned during assembly.
- Lubricant: Keeps the guide rail or straight edge moving smoothly if your design includes moving parts.
4. Tips for Choosing Materials
- Durability: Since your diy saw guide will be used frequently, opt for materials that can withstand wear and tear.
- Flatness: Ensure the plywood or MDF you choose is perfectly flat to avoid inaccuracies.
- Weight: Consider the weight of your materials—lighter options are easier to handle but may be less durable.
Why These Tools and Materials Matter
Using the right tools and materials ensures your diy saw guide is accurate, durable, and easy to use. A well-built guide will save you time, improve your cuts, and last for years to come. Now that you’ve gathered everything you need, let’s move on to the step-by-step instructions for building your diy saw guide!
Step-by-Step Instructions to Build Your DIY Saw Guide
Building a diy saw guide is easier than you might think, and the results are well worth the effort. Follow these step-by-step instructions to create a precise and durable diy saw guide that will elevate your woodworking projects.
Step 1: Measure and Cut the Base Material
- Start by measuring the length of your circular saw or table saw base. Add a few extra inches to ensure the diy saw guide is long enough for your projects.
- Use a circular saw or table saw to cut a piece of plywood or MDF to the desired size. This will serve as the base of your diy saw guide.
- Sand the edges to remove any roughness and ensure a smooth finish.
Step 2: Attach the Guide Rail
- Place your straight edge or aluminum strip along one edge of the plywood base. Ensure it’s perfectly aligned and straight using a level.
- Clamp the straight edge in place to prevent it from moving during the next steps.
- Drill pilot holes through the straight edge and into the plywood base. This will prevent the wood from splitting when you attach the screws.
- Secure the straight edge to the base using screws. Double-check that it’s still straight before tightening the screws completely.
Step 3: Test the Alignment
- Place your circular saw or table saw against the diy saw guide to ensure it fits snugly. The saw’s base should glide smoothly along the straight edge.
- Make any necessary adjustments to the guide rail or base to ensure perfect alignment.
Step 4: Add Optional Features (If Desired)
- T-Track: If you want to add clamps or stops for repeatable cuts, consider routing a T-track into the base of your diy saw guide.
- Non-Slip Padding: Attach adhesive non-slip padding to the bottom of the guide to prevent it from sliding during use.
- Measurement Marks: Use a permanent marker to add measurement markings along the edge of the guide for quick reference.
Step 5: Test Your DIY Saw Guide
- Place the diysaw guide on a piece of scrap wood or plywood. Clamp it securely to prevent movement.
- Run your circular saw or table saw along the guide to make a test cut. Check the cut for accuracy and adjust the guide if needed.
Tips for Success
- Work Slowly and Carefully: Precision is key when building a DIY saw guide. Take your time to ensure everything is measured and aligned correctly.
- Double-Check Measurements: A small error in measurement can lead to inaccurate cuts. Always measure twice and cut once.
- Use Clamps: Secure your materials and guide rail with clamps to prevent movement during assembly.
- Test Before Final Use: Always test your DIY saw guide on scrap material before using it on your actual project.
Tips for Using Your DIY Saw Guide
Once you’ve built your saw guide, it’s time to put it to work! These tips will help you get the most out of your new tool, ensuring clean, accurate cuts every time.
1. Always Secure the Guide
- Use clamps to hold the guide firmly in place before making any cuts. This prevents it from shifting, which can lead to uneven or inaccurate results.
- If you’re working on a large piece of material, use multiple clamps to ensure stability along the entire length of the guide.
2. Double-Check Alignment
- Before making a cut, verify that the guide is perfectly aligned with your cut line. Use a measuring tape or square to confirm the position.
- For long cuts, consider using a level to ensure the guide remains straight from start to finish.
3. Use the Right Blade
- Choose a saw blade that’s appropriate for the material you’re cutting. For example, use a fine-tooth blade for plywood and a coarse blade for thicker hardwoods.
- Ensure the blade is sharp and in good condition to avoid splintering or rough edges.
4. Make Test Cuts
- Before cutting into your project material, make a test cut on a scrap piece. This allows you to confirm the guide’s accuracy and make any necessary adjustments.
- Pay attention to the quality of the cut. If it’s not clean or straight, recheck the alignment of the guide and the saw.
6. Store It Properly
- Store the guide in a dry, flat area to prevent warping or damage. Hanging it on a wall or placing it on a shelf are good options.
- Avoid stacking heavy objects on top of the guide, as this can cause it to bend or lose its shape.
7. Experiment with Different Applications
- Use the guide for a variety of cuts, including crosscuts, rip cuts, and angled cuts. It’s a versatile tool that can handle many woodworking tasks.
- For repeatable cuts, consider adding stops or markers to the guide to ensure consistency across multiple pieces.
Why These Tips Matter
Following these tips will help you achieve professional-quality results with your saw guide. Whether you’re building furniture, cutting plywood, or tackling a home renovation project, a well-maintained and properly used guide is an invaluable tool in your workshop.
Common Applications for Your DIY Saw Guide
A well-built saw guide is a versatile tool that can be used for a wide range of woodworking tasks. Here are some of the most common applications where this tool can make a significant difference:
1. Cutting Plywood and Sheet Materials
- Working with large sheets of plywood or MDF can be challenging, especially when trying to make straight, precise cuts. A saw guide ensures clean, accurate cuts every time, whether you’re trimming edges or dividing the sheet into smaller pieces.
- This is particularly useful for projects like building cabinets, shelves, or furniture where precision is critical.
2. Creating Straight Edges for Furniture
- When building tables, chairs, or other furniture, straight edges are essential for both aesthetics and functionality. A saw guide helps you achieve perfectly straight cuts, ensuring your pieces fit together seamlessly.
- It’s also great for trimming rough lumber or salvaged wood to create smooth, even edges.
3. Making Repeatable Cuts
- If your project requires multiple pieces of the same size, a saw guide can save you time and ensure consistency. Simply set up the guide once, and you can make identical cuts quickly and accurately.
- This is ideal for projects like building picture frames, shelving units, or decorative panels.
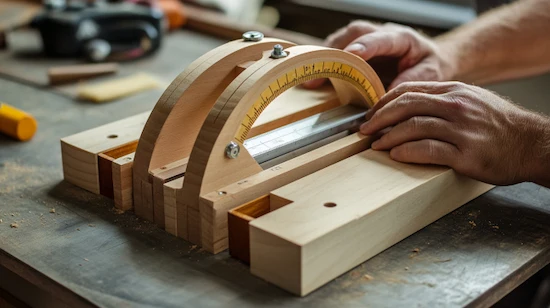
4. Angled Cuts for Complex Projects
- While saw guides are often associated with straight cuts, they can also be used for angled cuts. By adjusting the position of the guide or using a protractor, you can create precise bevels or miters for projects like trim work or custom furniture.
- This makes the tool invaluable for more advanced woodworking tasks.
5. Home Renovation Projects
- Whether you’re installing flooring, cutting trim, or building custom storage solutions, a saw guide ensures clean, professional-quality cuts. It’s especially helpful when working with expensive materials, as it minimizes waste and reduces the risk of mistakes.
6. Craft Projects and Small DIY Tasks
- Even smaller projects can benefit from the precision of a saw guide. For example, cutting small pieces of wood for picture frames, birdhouses, or decorative items becomes much easier and more accurate.
- It’s also great for hobbyists who want to achieve clean, polished results in their creations.
7. Repair and Restoration Work
- If you’re repairing furniture or restoring old pieces, a saw guide can help you make precise cuts to replace damaged sections or trim uneven edges.
- This ensures that the repaired piece looks as good as new.
Why These Applications Matter
A saw guide isn’t just a tool for large-scale projects—it’s a versatile addition to any workshop that can improve the quality and efficiency of your work. Whether you’re a professional woodworker or a DIY enthusiast, this tool will help you tackle a wide range of tasks with confidence and precision.
Conclusion
Building your own saw guide is a simple yet transformative project that can elevate your woodworking skills to the next level. From ensuring perfectly straight cuts to saving time and materials, this tool is a must-have for anyone who values precision and efficiency in their projects. Whether you’re cutting plywood, building furniture, or tackling home renovations, a well-crafted saw guide will make your work easier, faster, and more professional.
By following the steps and tips outlined in this guide, you’ll have a durable and reliable tool that’s tailored to your specific needs. So, grab your materials, fire up your saw, and start building your own saw guide today. Your future projects—and your workshop—will thank you!
")