
Are you searching for the perfect way to maximize space and add style to your child’s bedroom? A diy twin over full bunk bed is the ideal solution for families who want both functionality and fun. Building your own diy twin over full bunk bed not only saves money but also lets you customize every detail to match your kids’ needs and your home’s decor.
Whether you’re a seasoned DIY enthusiast or a first-time builder, this guide will walk you through everything you need to know about creating a sturdy and safe diy twin over full bunk bed. Discover creative plans, essential safety tips, and inspiring ideas to help you build a unique and practical bunk bed that your children will love for years to come. Read on to find the top diy twin over full bunk bed plans and learn how you can transform your kids’ room with a rewarding project you can proudly say you built yourself!
Why Choose a DIY Twin Over Full Bunk Bed for Your Kids’ Room?

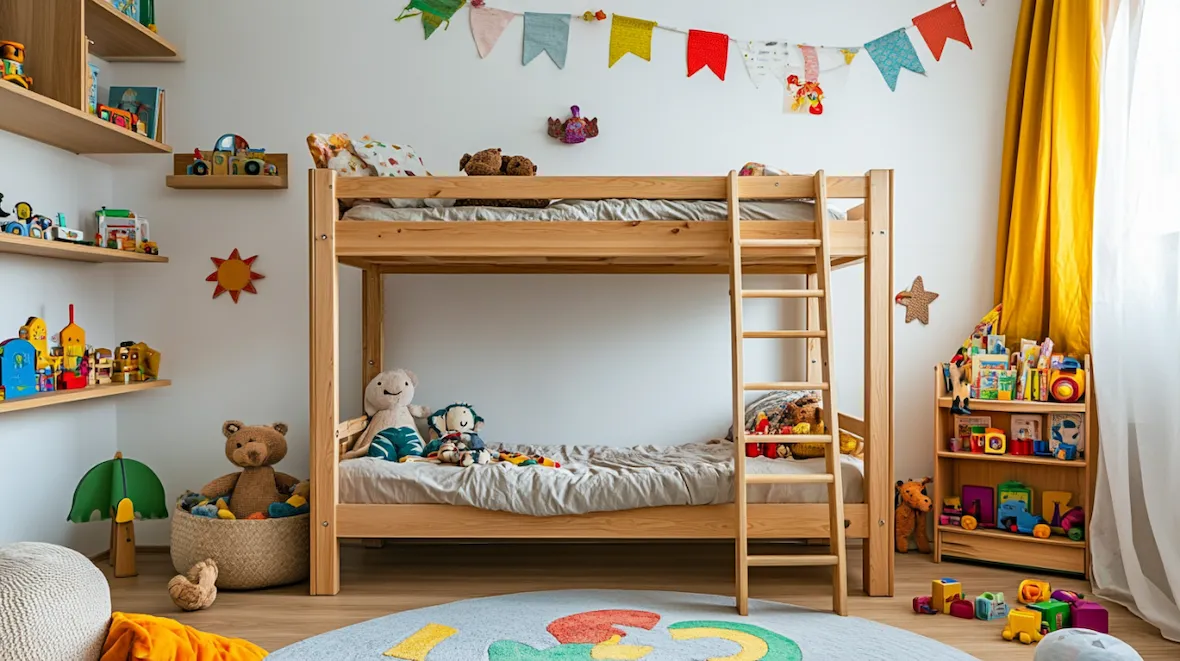
Choosing a diy twin over full bunk bed for your kids’ room is a smart way to make the most of limited space while giving your children a comfortable and stylish place to sleep. A diy twin over full bunk bed offers more than just sleeping arrangements—it provides extra room for play, study, and storage, all while adding a personal touch to your home. With a diy twin over full bunk bed, you can customize the design, select safe and durable materials, and save money compared to buying a store-bought bunk bed. This makes it a popular choice for families looking to combine creativity, function, and affordability.
Benefits and Ideas for a DIY Twin Over Full Bunk Bed
- Space-Saving Solution:
A diy twin over full bunk bed helps you make the most of vertical space, which is perfect for smaller bedrooms or shared spaces. - Customizable Designs:
Build your diy twin over full bunk bed to fit your child’s interests—choose different colors, add fun features like a slide, or create themed designs such as castles or treehouses. - Budget-Friendly:
Creating your own diy twin over full bunk bed can be much more affordable than purchasing a new one. You can select materials that fit your budget and repurpose existing wood or hardware. - Extra Storage:
Integrate drawers, shelves, or even a trundle bed beneath your diy twin over full bunk bed for added storage of toys, clothes, or bedding. - Learning and Bonding Opportunity:
Building a diy twin over full bunk bed can be a family project that teaches kids valuable skills and creates lasting memories together.
Creative Ideas and “Toys” to Add
- Built-in Bookshelves: Store bedtime stories right next to the bed.
- Toy Storage Drawers: Keep toys and games organized and out of the way.
- Slide Attachment: Make getting out of bed in the morning a fun adventure.
- Play Curtain or Fort: Turn the lower bunk into a secret hideaway or playhouse.
- Clip-On Reading Lights: Encourage independent reading time before bed.
A diy twin over full bunk bed is more than just a piece of furniture—it’s a practical, creative, and rewarding addition to any child’s bedroom. With endless customization options, you can design a space that grows with your kids and makes every night something special.
Essential Tools and Materials for a DIY Twin Over Full Bunk Bed
Before you begin building, having the right tools and materials will make your project smoother, safer, and more enjoyable. With careful planning and the proper supplies, you can ensure your bunk bed is sturdy, stylish, and built to last. Here’s what you’ll need to gather for a successful build, along with some creative ideas to make your project even more functional and fun.
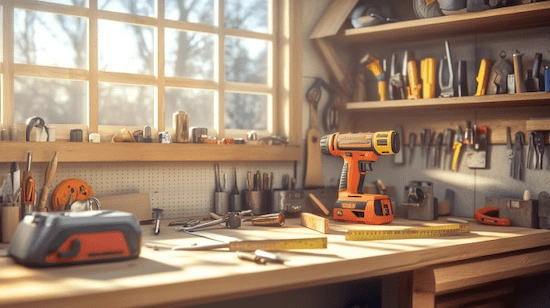
Tools You’ll Need
- Measuring Tape: For accurate measurements of wood and space.
- Power Drill & Bits: Essential for assembling the frame and securing hardware.
- Circular Saw or Miter Saw: To cut wood to the right size.
- Screwdrivers & Wrenches: For attaching bolts, screws, and brackets.
- Sander or Sandpaper: To smooth rough edges and surfaces.
- Level: Ensures everything is straight and safe.
Recommended Materials
- Wood Boards (Pine, Oak, or Plywood): Choose high-quality lumber for durability.
- Bolts, Screws, and Brackets: These fasteners hold the structure together.
- Guardrails and Ladder Kits: For safety and easy access to the top bunk.
- Non-Toxic Paint or Stain: Customize the look to match your child’s room.
- Mattress (Twin and Full Size): Make sure to measure carefully for a perfect fit.
Smart Add-Ons and “Toys”
- Under-bed Storage Drawers: Great for organizing toys, clothes, or bedding.
- Clip-on Lights or Reading Lamps: Add a cozy touch for nighttime reading.
- Decorative Panels or Curtains: Personalize the lower bunk as a play space or secret fort.
- Built-in Bookshelves: Keep bedtime stories close at hand.
Having these tools and materials ready will not only make the building process easier but also open up new possibilities to create a unique, safe, and functional bed your kids will love. Always double-check your measurements and safety guidelines to ensure a successful project from start to finish.
Step-by-Step Guide: How to Build a DIY Twin Over Full Bunk Bed
Building your own bunk bed may seem like a big task, but with the right approach and a clear plan, you can create a safe and stylish sleeping space for your kids. Follow this practical, step-by-step guide to take your project from concept to completion. Each stage includes ideas to help you customize the bunk bed and add unique features your children will love.
Step 1: Plan and Measure Your Space
Begin by measuring the room where you’ll place your bunk bed. Take into account the ceiling height, the bed’s footprint, and any doors or windows nearby. Careful planning ensures a good fit and a safe setup.
Step 2: Cut and Prepare the Lumber
Using your measurements, cut the wood for the bed frame, legs, rails, and ladder. Sand each piece to remove rough edges and prevent splinters. This is also the perfect time to decide on any extra features, like storage drawers or built-in bookshelves.
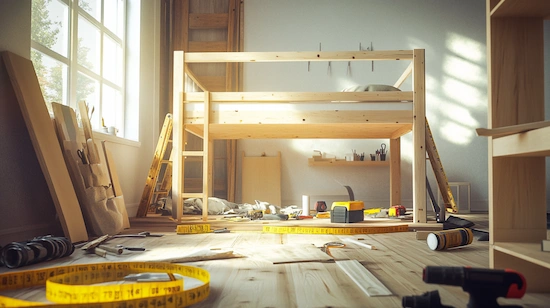
Step 3: Assemble the Bed Frame
Start by assembling the lower full-size frame, followed by the upper twin frame. Use sturdy bolts and brackets for all connections. Make sure to double-check with a level so every part is secure and straight.
Step 4: Install the Ladder and Guardrails
Attach the ladder to the bunk bed, making sure it’s easy to climb and firmly fixed. Secure guardrails along the top bunk for safety, leaving an opening for easy access. Test all joints and supports before allowing kids to use the bed.
Step 5: Add Finishing Touches
Paint or stain the wood in your chosen colors, using non-toxic products for a kid-friendly finish. Let everything dry thoroughly before assembly. Once finished, set up the mattresses and any creative extras, like curtains, a play tent, or clip-on reading lights.
Ideas and “Toys” to Enhance Your Project:
- Under-bed storage drawers: Keep toys and clothes organized.
- Slide attachment: Add a playful element for morning fun.
- Themed paint or decals: Personalize the bed with your child’s favorite characters or colors.
- Built-in bookshelf: Store bedtime books within easy reach.
- Clip-on reading lamp: Perfect for late-night storytime.
By following these steps, you’ll create a bunk bed that is both practical and fun, perfectly tailored to your kids’ needs and your home’s style. Take your time with each phase and enjoy the process of building something truly special.
Creative DIY Twin Over Full Bunk Bed Plans and Design Ideas
When it comes to making a kids’ room both functional and fun, creativity is key. There are so many exciting ways to personalize a bunk bed to fit your children’s personalities and needs. From playful themes to clever storage solutions, these design ideas will help you make the most of your space and turn your bunk bed project into something truly special. Here are some inspiring plans and features you can add to make your design stand out.
Inspiring Plans and Ideas
- Classic Bunk with Storage:
Incorporate built-in drawers or shelves underneath the bottom bunk for storing clothes, books, or toys. This not only saves space but keeps everything tidy and organized. - Adventure Theme:
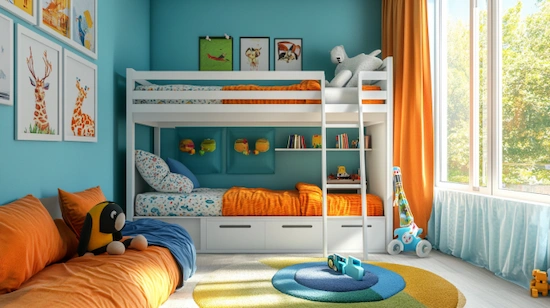
Paint the bed with bold colors or add decals to create a castle, treehouse, or pirate ship vibe. Use curtains or fabric panels to turn the lower bunk into a private fort or reading nook. - Modern Minimalist Design:
Choose clean lines and neutral tones for a sleek, contemporary look. Add LED strip lights under the top bunk for a cool, modern touch that also works as a night light. - Slide Addition:
Turn mornings into an adventure by attaching a slide to the bunk bed. This playful addition is a big hit with kids and makes getting up each day a little more exciting. - Built-In Desk or Study Space:
Maximize function by adding a desk under the full bed or along one side. This is perfect for homework, crafts, or as a creative zone for art projects.
Extra Features and “Toys” to Consider
- Clip-on Reading Lights: Ideal for bedtime stories or quiet reading time.
- Chalkboard Panels: Add a chalkboard surface on one end for drawing and doodling.
- Toy Storage Bins: Use color-coordinated bins for quick clean-up and easy access to favorite toys.
- Rope Ladder or Climbing Handles: For an added challenge and a little extra fun.
With a bit of imagination, your project can become more than just a place to sleep—it can be a hub for play, creativity, and growth. Explore different design ideas, involve your children in the planning, and enjoy building a space that fits your family’s lifestyle.
Safety Tips and Maintenance for Your DIY Twin Over Full Bunk Bed
Safety should always be the top priority when it comes to any furniture for children, especially a bunk bed. With the right precautions and regular care, your DIY twin over full bunk bed can provide a safe, comfortable, and long-lasting space for your kids to sleep and play. This section covers important safety tips to follow, as well as practical maintenance ideas to keep your project in excellent condition for years to come.
Key Safety Tips
- Sturdy Construction:
Always use high-quality wood and hardware to ensure the structure is solid. Double-check all joints, bolts, and screws before letting kids use the bed. - Guardrails and Secure Ladders:
Install guardrails on the top bunk and make sure the ladder is securely attached. The opening for the ladder should be just big enough for safe climbing, but not too wide. - Proper Mattress Fit:
Use mattresses that fit snugly within the frames to prevent gaps where little arms or legs could get stuck. Avoid using overly thick mattresses that could reduce the height of the guardrail. - Weight Limits:
Follow recommended weight limits for both bunks and the ladder. It’s best to allow only one child on the top bunk at a time. - Safe Placement:
Position the bunk bed away from ceiling fans, windows, and light fixtures. Make sure there’s plenty of space around the bed for easy access.
Maintenance and Upkeep Ideas
- Regular Hardware Checks:
Inspect bolts, screws, and brackets every month. Tighten any loose fittings and replace worn hardware as needed. - Surface Care:
Sand down any rough spots and touch up paint or finish to keep surfaces smooth and splinter-free. Use non-toxic finishes for safety. - Clean and Organize:
Dust the bed frame regularly and keep storage areas beneath the bunk tidy to avoid tripping hazards. - Upgrade Features:
Add non-slip grips to ladder steps and replace any worn-out guardrails. Consider updating accessories like clip-on reading lights or storage bins as your child grows.
“Toys” and Extras for Added Safety
- Clip-on Nightlights: Make nighttime trips up and down the ladder safer.
- Soft Rugs or Mats: Place these around the bunk bed to cushion any accidental falls.
- Removable Bunk Curtains: Give privacy without blocking supervision.
By following these safety guidelines and maintaining your bunk bed regularly, you’ll ensure a safe and enjoyable experience for your children. Good maintenance and careful use will make your DIY twin over full bunk bed a lasting investment in both comfort and peace of mind.
FAQ: DIY Twin Over Full Bunk Bed
1. Is it difficult to build a DIY twin over full bunk bed at home?
Building a DIY twin over full bunk bed can be straightforward if you follow detailed plans and have basic woodworking skills. The process includes measuring, cutting, assembling, and securing all components. Many DIYers find the project rewarding, and with step-by-step guides, even beginners can succeed.
2. What tools are essential for building a DIY twin over full bunk bed?
You’ll need a power drill, saw, sander, measuring tape, screwdrivers, wrenches, and a level. These tools help ensure your DIY twin over full bunk bed is sturdy, safe, and accurately assembled.
3. Are there free plans available for DIY twin over full bunk beds?
Yes, there are plenty of free and paid plans online for a DIY twin over full bunk bed. These plans often include material lists, measurements, and diagrams to make your project easier to complete.
4. How can I make a DIY twin over full bunk bed safer for my kids?
To increase safety, use strong guardrails on the top bunk, secure the ladder, use a snug-fitting mattress, and regularly check all hardware. Position the DIY twin over full bunk bed away from windows and fans, and only allow children old enough to safely use the upper bunk.
5. What are some creative ways to customize a DIY twin over full bunk bed?
Personalize your project by adding storage drawers, a slide, themed paint or decals, built-in bookshelves, or curtains for privacy. These features can make your DIY twin over full bunk bed more fun and practical for your family.
Conclusion
A DIY twin over full bunk bed is the perfect project for families who want to maximize bedroom space, encourage creativity, and save money. By building your own bunk bed, you can customize every detail to suit your children’s needs and preferences while ensuring safety and durability. Whether you choose classic designs, creative add-ons, or clever storage solutions, a DIY twin over full bunk bed will transform your kids’ room into a fun, functional, and inviting space. Start your project today and enjoy the satisfaction of building something special for your family—one that your children will treasure for years to come.
")